

Workloads
Nex CE Deployment
This page covers how to configure and deploy a Nex CE node as a container. For an overview of what Nex CE is, see Nex CE.
Nex CE is published as a container image whose entrypoint is the nex-ce binary, so any argument you pass after the image name is passed straight to nex-ce. A node is started with the node up command:
docker run --rm \
  -v "$(pwd)/config.json:/etc/nex-ce/config.json:ro" \
  -v "$(pwd)/ngs.creds:/etc/nex-ce/ngs.creds:ro" \
  registry.synadia.io/nexce:latest \
  node up
The same pattern works with podman run.
Configuration
A Nex node is configured through a JSON config file, CLI flags appended after the image name, or a mix of both. CLI flags take precedence over the config file.
The container looks for its config file at /etc/nex-ce/config.json by default, so the simplest setup is to mount your config to that path (as in the example above). To use a different in-container path, mount it wherever you like and point at it with --config:
docker run --rm \
  -v "$(pwd)/config.json:/config.json:ro" \
  registry.synadia.io/nexce:latest \
  node up --config /config.json
Make sure you change
node_seedto your own unique seed. Generate a server seed using nk:nk -gen=server -pubout
Example config file
{
  "namespace": "system",

  "logger": {
    "level": "info"
  },

  "nats": {
    "servers": ["nats://connect.ngs.global"],
    "creds_file": "/etc/nex-ce/ngs.creds"
  },

  "name": "nexnode",
  "nexus": "nexus",
  "node_seed": "SNAKXRJB...",
  "creds_signing_key": "SAANZQ3BU6Y...",
  "control_account": "ADH253XRZ...",

  "nexlets": {
    "native": {
      "enabled": true,
      "registerType": "native"
    },
    "containers-podman": {
      "enabled": true,
      "registerType": "container",
      "podmanUser": "user"
    }
  }
}
When using platform (Control Plane) registration, omit nexus and control_account. They are populated automatically from the platform response:
{
  "nats": { "...": "<see above>" },
  "name": "nexnode",
  "node_seed": "SNAKXRJB...",
  "nexlets": { "...": "<see above>" },
  "logger": { "...": "<see above>" },
  "platform": {
    "enabled": true,
    "url": "<sc_api_url>",
    "token": "<some_token>"
  }
}
Global Options
| Flag | Default | Description |
|---|---|---|
--config | Load configuration from file | |
--json | false | Display output in JSON format |
--namespace | system | Namespace for nex commands (env: NEX_NAMESPACE) |
--version, -v | Show application version |
Logger Options
All logger options use the --logger.* flag prefix (or the "logger": {} object in config).
| Flag | Default | Description |
|---|---|---|
--logger.level, -l | info | Log level: fatal, error, warn, info, debug, trace |
--logger.file | File to write logs to; empty sends logs to stdout | |
--logger.json | false | Enable JSON formatted logs |
--logger.color | false | Enable colorized logs |
--logger.short | false | Use abbreviated log levels (e.g. DBG instead of DEBUG) |
--logger.timefmt | DateTime | Time format: DateTime, TimeOnly, DateOnly, Stamp, RFC822, RFC3339 |
--logger.with-pid | false | Include process ID in log messages |
--logger.group-on-right | false | Place log group on the right side |
--logger.workload-logs | false | Add workload logs to Nex log output |
NATS Options
All NATS options use the --nats.* flag prefix (or the "nats": {} object in config).
| Flag | Default | Description |
|---|---|---|
--nats.context | NATS context to use; takes priority over other auth options | |
--nats.servers, -s | NATS servers to connect to | |
--nats.creds-file | Path to a NATS credentials file | |
--nats.nkey | User NKEY file for single-key auth | |
--nats.seed | Seed for user credentials | |
--nats.jwt | JWT for user credentials | |
--nats.user | Username for credentials | |
--nats.password | Password for credentials | |
--nats.jsdomain | JetStream domain | |
--nats.conn-name | nexce-<version> | NATS connection name |
--nats.timeout | Timeout for NATS operations (e.g. 5s) | |
--nats.tlscert | Path to TLS certificate | |
--nats.tlskey | Path to TLS key | |
--nats.tlsca | Path to TLS root CA | |
--nats.tlsfirst | false | Enable TLS-first handshake |
Node Options
These options apply to the node up command (appended after the image name). --node-seed is required (typically supplied via the config file).
| Flag | Required | Default | Description |
|---|---|---|---|
--node-seed | Yes | NKey seed for this node (SNAKXRJB...) | |
--name | nex | Name of the Nex server | |
--nexus | Nexus this node belongs to | ||
--tags | Tags for the node (e.g. hosted=true) | ||
--creds-signing-key | Seed of the key used to sign workload credentials | ||
--control-account | NATS account public key in which Nex runs | ||
--allow-remote-register | false | Allow remote registration of Nex servers | |
--auction-ttl | 1m | TTL for auction IDs to remain valid |
The creds_signing_key (config) / --creds-signing-key (CLI) is a "Programmatic Key" generated under Users > Group in Control Plane. The control_account (config) / --control-account (CLI) is the account public key shown on the Control Plane overview page.
Platform Options
| Flag | Default | Description |
|---|---|---|
--platform.enabled | false | Enable platform (Control Plane) registration |
--platform.type | workloads | Platform component type |
--platform.url | https://cloud.synadia.com | Control Plane API URL |
--platform.token | Control Plane platform component token |
When --platform.enabled is true, --nexus and --control-account must be omitted. They are populated automatically from the platform response.
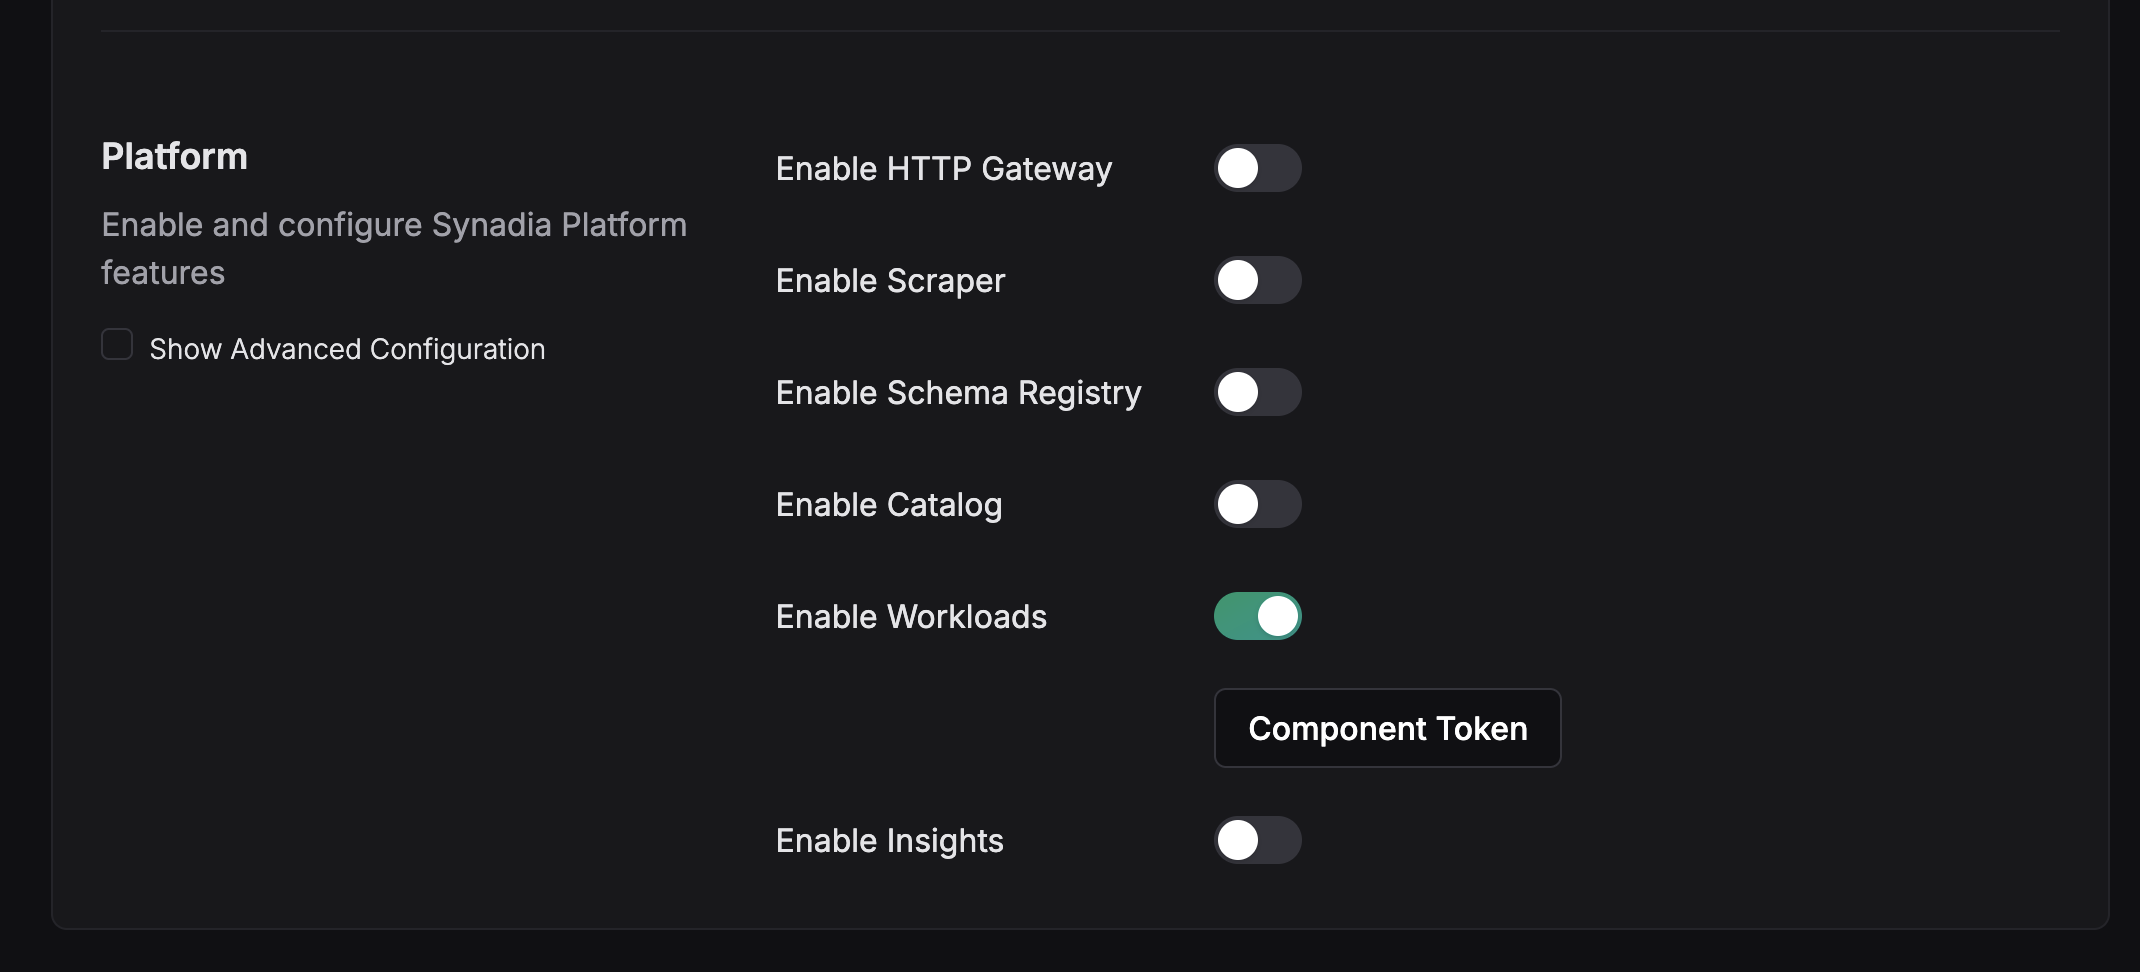
To get a platform component token, enable the Workloads platform component in Control Plane's system settings. Click Enable Workloads, click Submit to save the updated settings, then click Component Token to get the token.
Catalog Options
| Flag | Default | Description |
|---|---|---|
--catalog.enabled | false | Host a Synadia Catalog instance on this node |
--catalog.name | Synadia Catalog | Name of the catalog |
--catalog.id | NUID of the catalog | |
--catalog.token | Control Plane token |
When enabled, the node starts a Synadia Catalog service over NATS micro. The catalog uses the node's NATS connection and shuts down with the node.
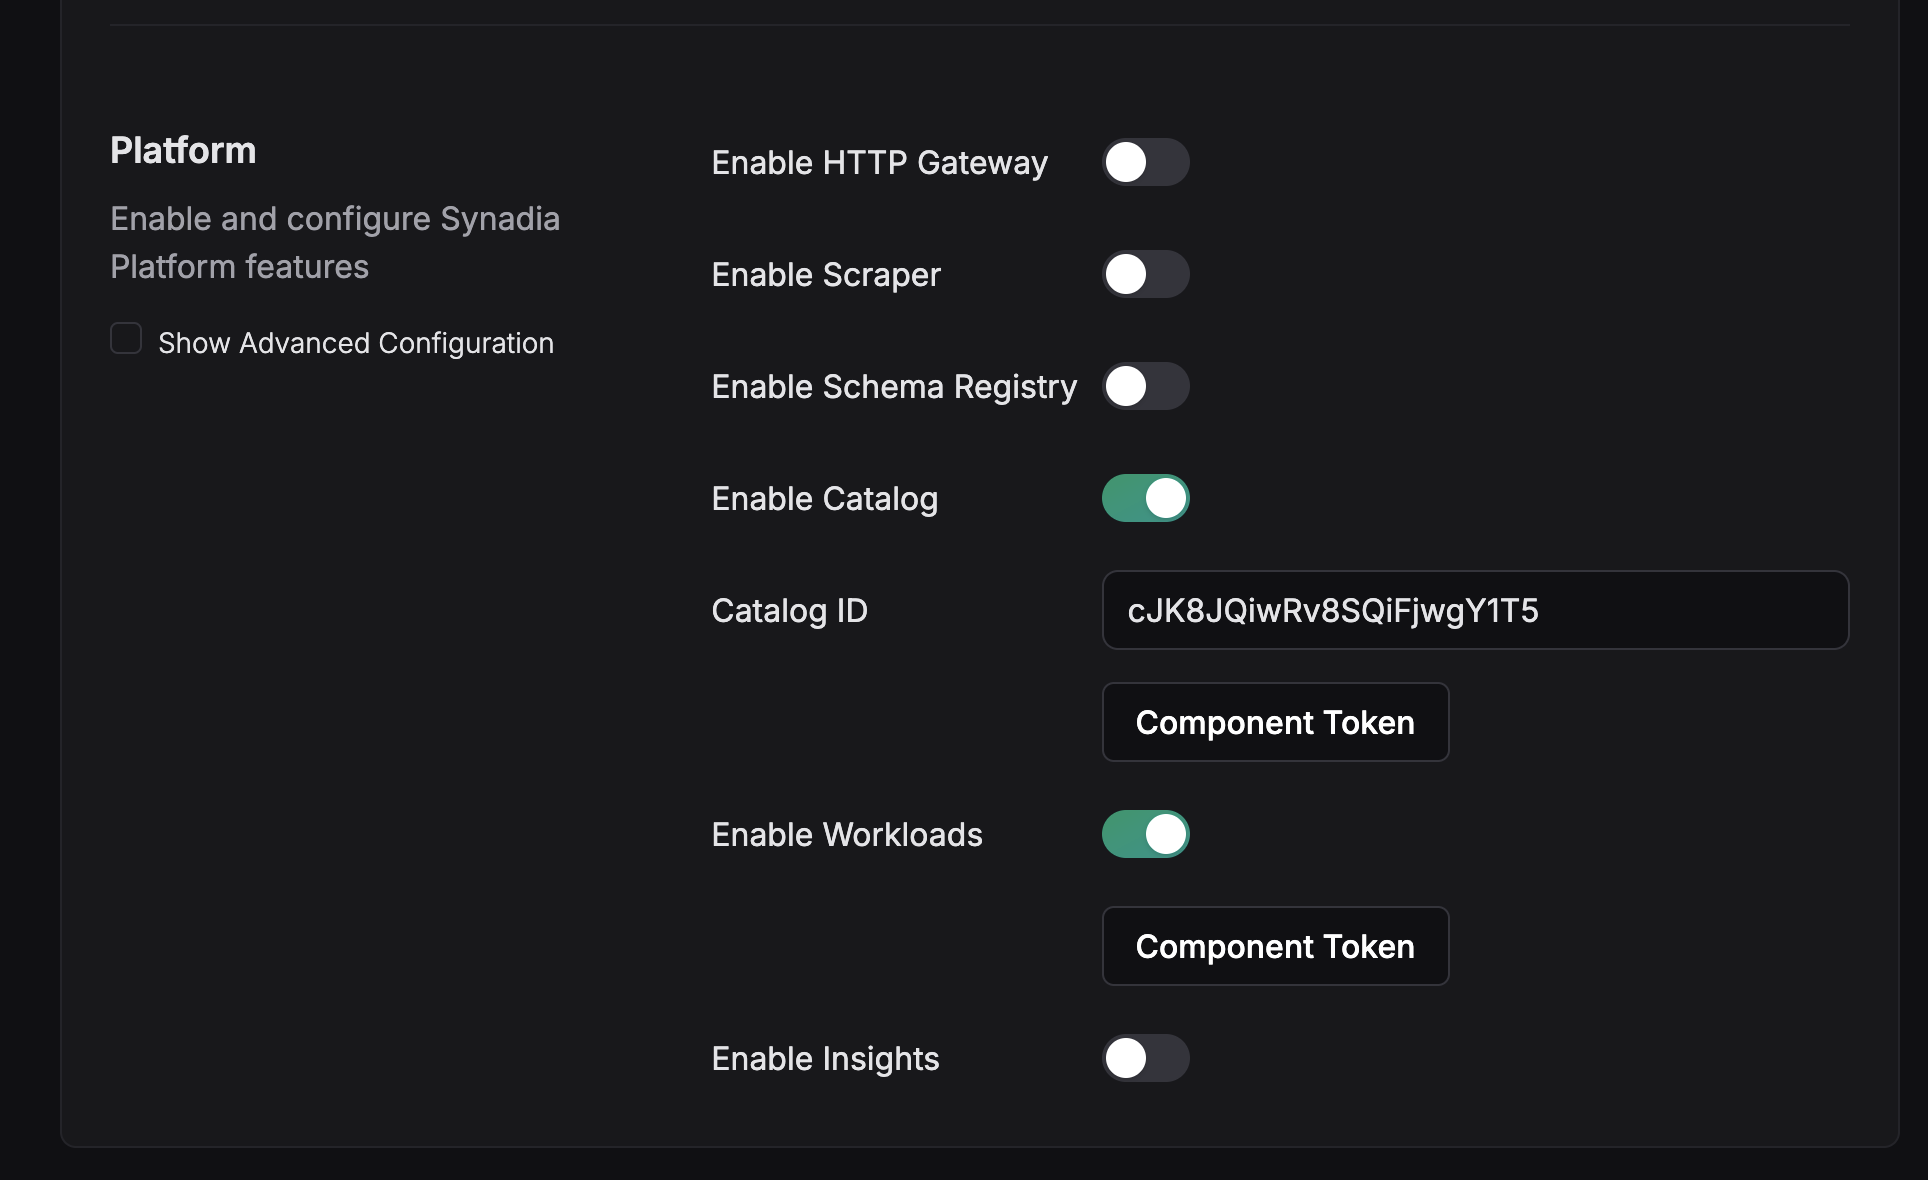
To get a platform component token, enable the Catalog platform component in Control Plane's system settings. Click Enable Catalog, enter the NUID of the catalog, click Submit to save the updated settings, then click Component Token to get the token.
Nexlet Options
Nexlets are the pluggable runtimes that execute workloads (native, Podman). They are configured exclusively via the "nexlets" object in the JSON config file. They cannot be set with CLI flags.
Map keys are the nexlet names (see Valid nexlets); field keys use camelCase matching the Go field names.
| Config Key | Default | Description |
|---|---|---|
enabled | false | Enable this nexlet |
registerType | Workload type this nexlet handles (native, javascript, container, connector) | |
allowIngress | false | Allow ingress connections to the nexlet |
ingressInterface | Network interface for ingress | |
podmanUser | Podman user (Podman nexlets) | |
podmanSocketPath | Path to Podman system socket (alternative to podmanUser) | |
podmanIdentityFile | Podman identity file |
Note: Podman nexlets require a socket running for the configured user. Use
podmanUserto specify the user, orpodmanSocketPathto point directly to a socket.
Valid nexlets
The nexlets available depend on the build tags compiled into the binary:
nativecontainers-podmanconnectors-podmancontainers-kubernetesconnectors-kubernetesjavascript-deno
You can see which nexlets are compiled into the image in the --version output:
$ docker run --rm registry.synadia.io/nexce:latest --version
0.0.0 [unknown] | Built: unknown
Nexlets: connectors-podman, containers-podman, native
Running a node
Each of the following appends a nex-ce command after the image name. Define a shell alias to keep the examples short:
alias nex-ce='docker run --rm \
  -v "$(pwd)/config.json:/etc/nex-ce/config.json:ro" \
  -v "$(pwd)/ngs.creds:/etc/nex-ce/ngs.creds:ro" \
  registry.synadia.io/nexce:latest'
# Start a node (config mounted at the default /etc/nex-ce/config.json)
nex-ce node up

# List running nodes
nex-ce node list

# List running nodes in a specific nexus
nex-ce node list --filter nex.nexus=mynexus

# Show detailed info about a node, including running agents
nex-ce node info NBTAFHAKW...

# Put a node into lame duck mode (workloads drain, then stop)
nex-ce node lameduck --delay 2m NBTAFHAKW...
A long-running node (
node up) is usually run withdocker run -d(detached) or under an orchestrator rather than the interactive--rmform shown here. The read-only client commands (node list,node info, etc.) connect to NATS and exit, so the--rmform is fine for those.
Deploying on Kubernetes
Nex CE can also run workloads as Deployments in a Kubernetes cluster.
The Kubernetes nexlets ship in a different build than the Podman nexlets. The trial tag,
nexce:trial, includes Podman nexlets. Numbered releases, e.g.nexce:0.3.1, include Kubernetes nexlets. You can also check the--versionoutput for the included nexlets.
Cluster resources
The node needs four things in the cluster:
A Namespace for the node, and a separate namespace for the workloads. Workload images must run as a non-root user.
A ServiceAccount for the node pod, plus a Role and RoleBinding in the workload namespace:
Resource Verbs deployments(apps)get,list,watch,create,delete,patchpodsget,list,watchpods/loggetsecretsget,list,create,delete,patchpods(metrics.k8s.io)get,listNothing is cluster-scoped. The
metrics.k8s.iorule is optional.The
secretsrule is not limited to Nex: the node can read and write every Secret in the workload namespace. Nex keeps each workload's NATS credentials and config in a Secret there. Use a namespace only for Nex workloads, so no unrelated Secret is in reach.A Secret that holds the node config. Mount it at
/etc/nex-ce/config.json, the default config path.A Deployment that runs the image with
node up, atreplicas: 1andstrategy: Recreate. Two nodes with one seed over one namespace duplicate logs and events.
To pull workload images from a private registry, add a kubernetes.io/dockerconfigjson Secret to the workload namespace, then attach it to that namespace's default ServiceAccount. Nex CE builds workload pods with no image pull secret and runs them as the default ServiceAccount, so the ServiceAccount is what makes the pull work:
kubectl -n nex-workloads patch serviceaccount default \
  -p '{"imagePullSecrets":[{"name":"synadia-registry"}]}'
Nexlet config
Enable the Kubernetes nexlets in the "nexlets" object. k8sNamespace is required:
Make sure you change
node_seedto your own unique seed. Generate a server seed using nk:nk -gen=server -pubout
{
  "name": "nex-k8s",
  "node_seed": "SNAKXRJB...",
  "logger": { "level": "info", "json": true },
  "nexlets": {
    "containers-kubernetes": {
      "enabled": true,
      "registerType": "container",
      "k8sNamespace": "nex-workloads"
    },
    "connectors-kubernetes": {
      "enabled": true,
      "registerType": "connector",
      "k8sNamespace": "nex-workloads"
    }
  },
  "platform": {
    "enabled": true,
    "url": "<control_plane_url>",
    "token": "<platform_component_token>"
  }
}
Kubernetes nexlet keys
| Config Key | Required | Description |
|---|---|---|
k8sNamespace | Yes | Namespace in which the nexlet creates workloads |
k8sKubeconfig | Path to a kubeconfig; omit to use the in-cluster config |
Workloads that request no CPU or memory get 1 core and 1024 MB.
Keeping the seed secret
The node public key derived from node_seed labels every workload object and names the node's KV bucket. Store the seed in a Secret and back it up. If you regenerate the seed, the node orphans every workload Deployment.
To keep the seed off the command line and out of a ConfigMap, split the config across two files. Nex CE reads /etc/nex-ce/config.json first, then the --config path, and merges them per setting. Put the node name, logger and nexlets in a ConfigMap at the default path. Put node_seed and platform.token in a Secret, then point --config at it.
Exit codes
| Code | Meaning |
|---|---|
0 | Success |
1 | Error |
5 | Build expired (contact Synadia for a new build) |
10 | Node shutdown due to lame duck command |