

Synadia Cloud
Quick Start
Prerequisites
NATS CLI installation
Access GitHub Releases: Scroll to Assets (click Show All) and choose appropriate OS zip file, such as linux-amd64.zip or windows-amd64.zip
Recommendation: Unzip and save file content in its own nats-cli folder.
Cluster of NATS servers
Our default system is available.
Windows Subsystem for Linux installation (Windows users only)
Overview
Five user guides accompany the Synadia Cloud Walkthrough videos:
Quick Start Workflow

System
After Synadia Cloud Sign-up, you access the dashboard.
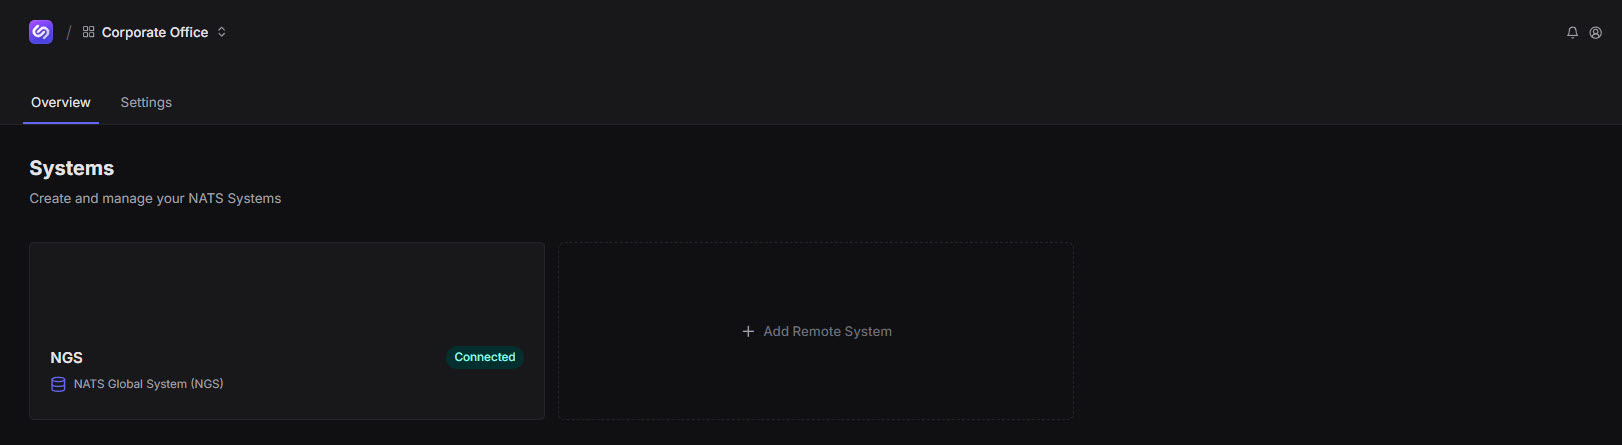
To access a system:
Click NGS.
This document, as with all user guides, uses the Personal/Free tier. This tier includes two accounts; one is a Default, which you can modify.
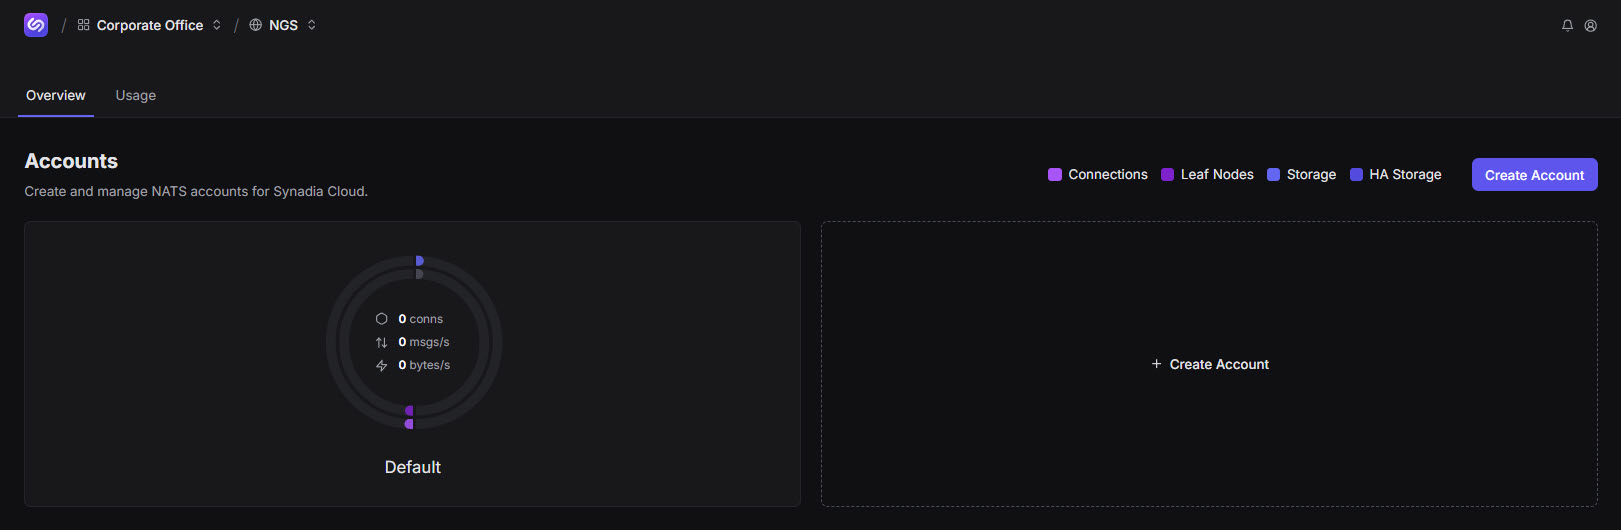
Account
Accounts allow you to allocate resources and commonly include business functions (Order, Purchase, Ship) or reflect DEV/TEST/PROD environments. The accounts you create will depend on your use case. In our example, we add an account specific to an app that manages orders: Cloud_Acct.
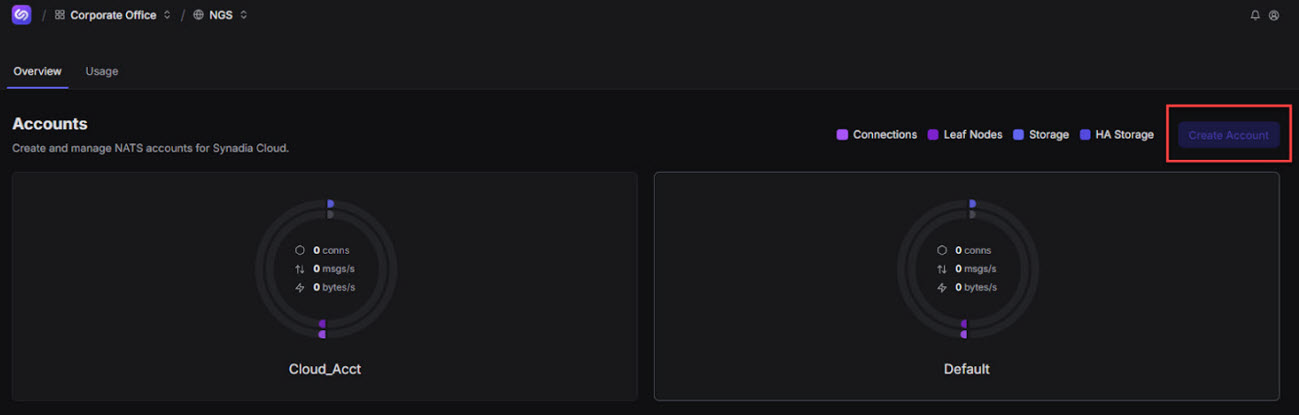
To create an account:
Click either of the two Create Account options.
Designate your account parameters to include an Account Name.
There is no need to focus on the parameters at this point. You can make edits later.
Save your updates.
Create Account becomes disabled and unavailable for selection, as you now have two accounts in use.
User
Users are commonly apps, devices, or microservices. The users you create will depend on your use case. In our example, the user is an app: cloud.
To create a user:
Click your new app account, Cloud_Acct.
Click the Users tab.
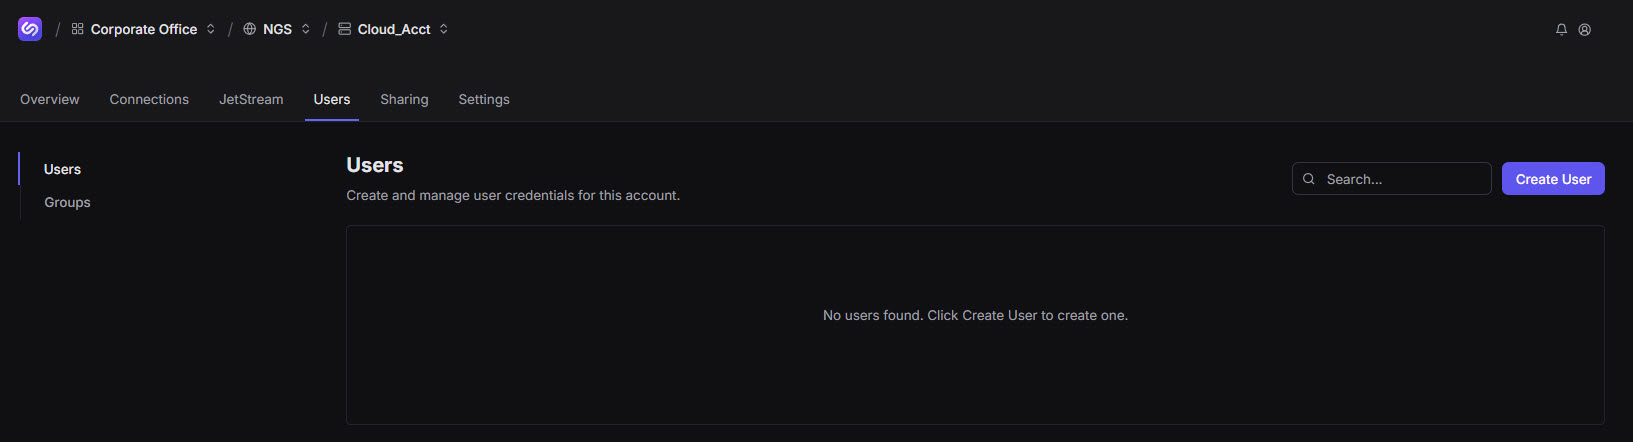
Click Create User.
Designate your user parameters.
Save your updates.
The table displays the user you created.
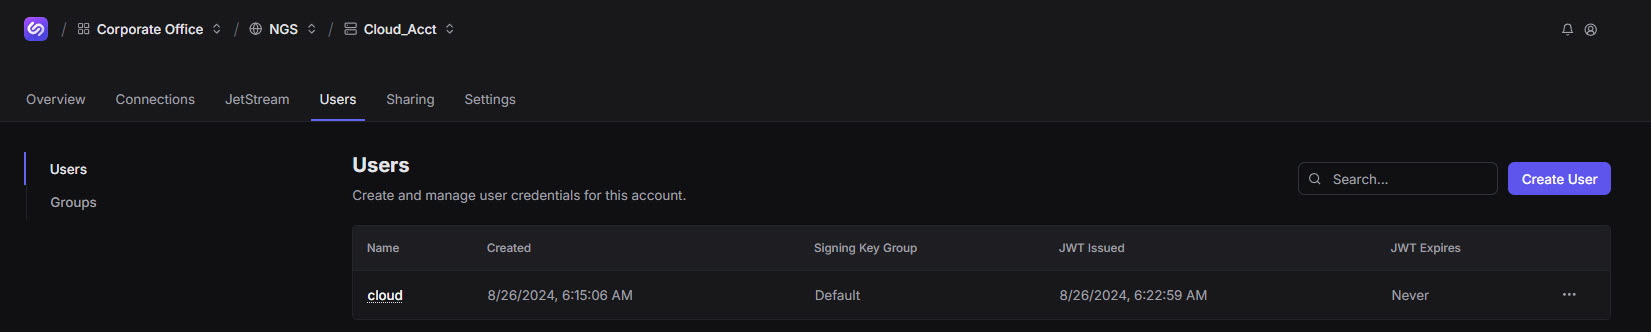
Click your new user from the Name column.
The Overview window opens. There are no Active Connections or Subscriptions. There is also no Recent Activity. Get Connected appears near the top right of the window.

Connection
For new users: Step 1 in the Get Connected window referenced below requires that you download a Credentials file. Save this file in your nats-cli folder, created as a prerequisite. If you did not create the nats-cli folder, save the Credentials file in the same folder as your nats-cli. You might also prefer to use environment variables.
For new Windows/PowerShell users: Step 2 in the Get Connected window requires that you copy a command statement. We recommend that you paste this command into Notepad++ (or similar editor), remove the backslash "\" separators, and use the Backspace key to ensure this statement appears on one continuous line. Equally as important, ".\" precedes this command (and others that you enter in your terminal). An example appears further below.
For new Linux users: In general, use a forward slash "/" as opposed to a backslash "\" when executing commands.
To establish a connection:
Click Get Connected.
A window by the same name opens, providing connection access via CLI, MQTT, or HTTP Gateway. For this Quick Start Guide, use CLI (default).
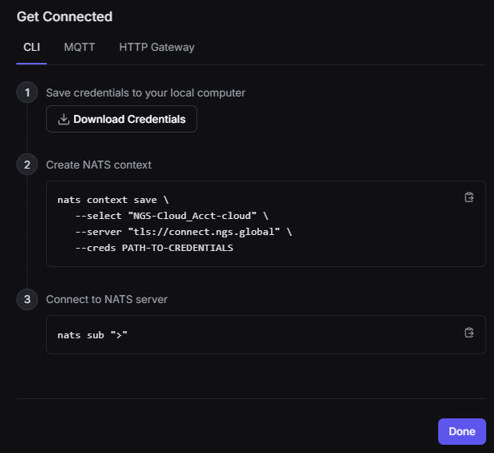
Step 1: Download Credentials
We have downloaded and saved the file at:
C:\Synadia_Software\nats-cliStep 2: Create NATS context
The context contains:
SYSTEM-ACCOUNT NAME-USER
In our example, the context appears as NGS-Cloud_Acct-cloud; NGS is our System, Cloud-Acct is our Account Name, and cloud is our User.
Copy the code then paste into your terminal.
We recommend that new Windows/PowerShell users follow the instructions specified in the Note above. Also, leaving one or more spaces between sections of the command statement (as shown below) does not impact execution.
Example:
.\nats context save --select "NGS-Cloud_Acct-cloud" --server "tls://connect.ngs.global" --creds C:\Synadia_Software\nats-cli\NGS-Cloud_Acct-cloud.creds
The Connection: OK terminal message appears.
Step 3: Connect to NATS server by executing the command:
.\nats sub ">"
Subscribing on > confirms communication.
Return to the UI, click Done to exit Get Connected, and Refresh the now open Overview window to view data in Active Connections, Subscriptions, and Recent Activity.

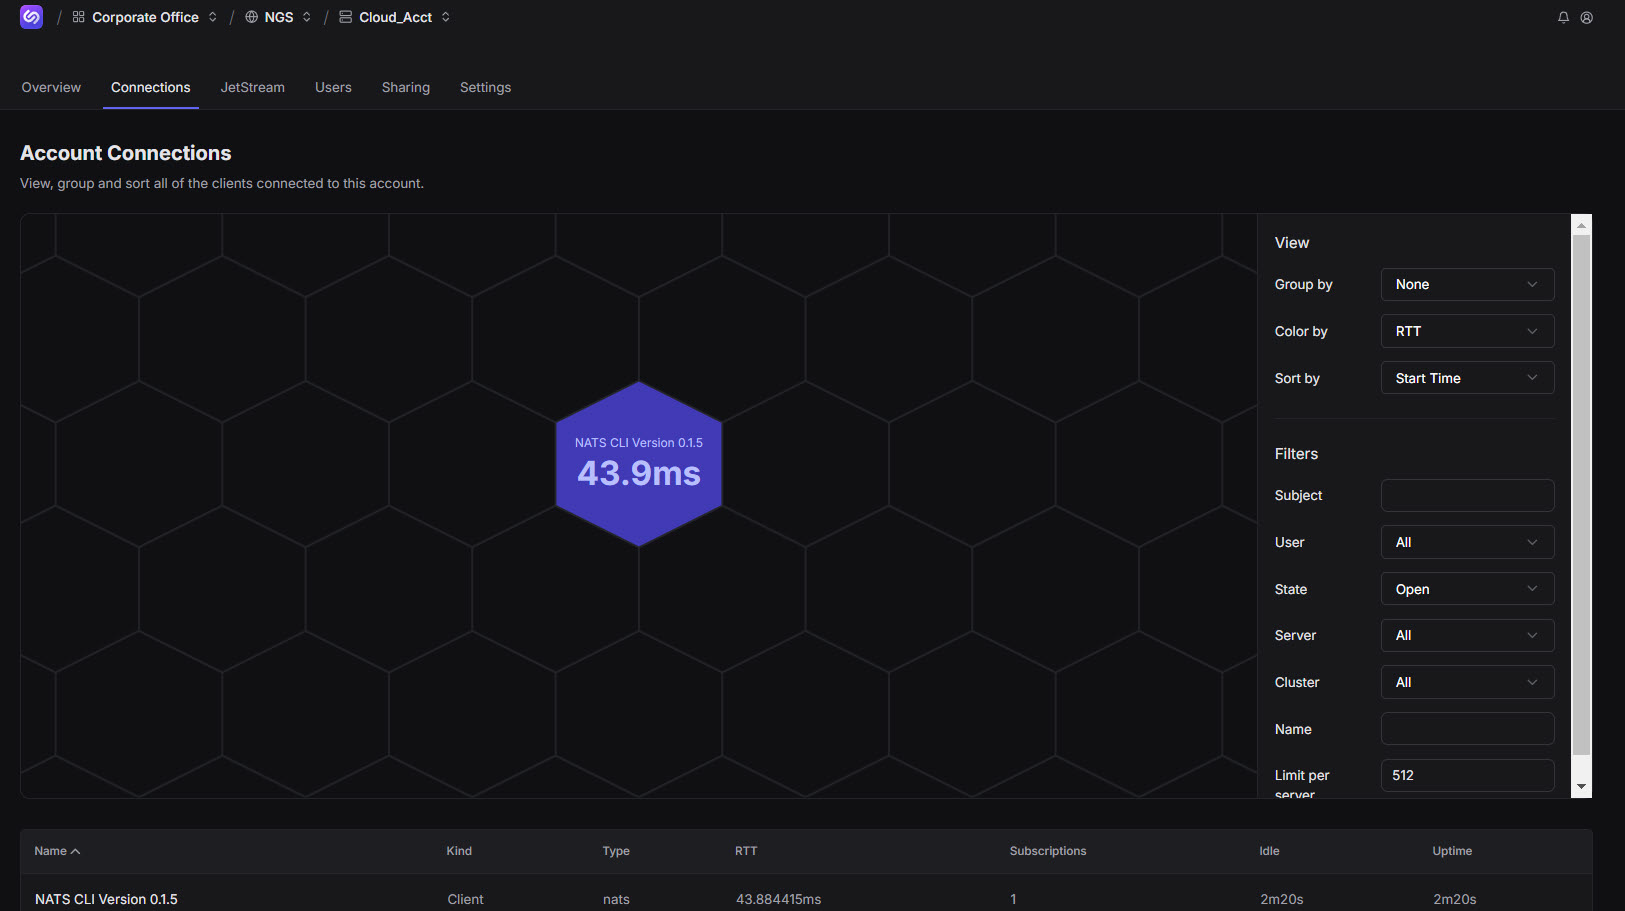
Click the Connections tab.
The Connections tab also displays data.
You have acquired Synadia Cloud provisioned and authenticated credentials, which are used to connect to the NATS server. More specifically, when you created a user, you downloaded a Credentials file that allowed your Synadia Cloud user to authenticate with the NATS server. We have specific tools available, such as the NATS Go Client, that allow you to connect to the NATS server by embedding this code within your app/device/microservice (user). This applies if your app, for example, is coded in Go. Similarly, if your app/device/microservice (user) is coded in Python or JavaScript, you’ll use the Python Client or JavaScript Client, respectively, to connect to the NATS server. We also support C, C#, Java, .NET, and Rust.
Next, we recommend that you read the Synadia Cloud Overview User Guide.