Synadia Cloud
User Management
Users commonly include apps, devices, or microservices. The users you create will depend on your use case. When you create a user, you download a Credentials file that allows your Synadia Cloud user to authenticate with the NATS server. We have specific tools available, such as the NATS Go Client, that allow you to connect to the NATS server by embedding this code within your app/device/microservice (user). This applies if your app, for example, is coded in Go. Similarly, if your app/device/microservice (user) is coded in Python or JavaScript, you’ll use the Python Client or JavaScript Client, respectively, to connect to the NATS server. We also support C, C#, Java, .NET, and Rust.
Security
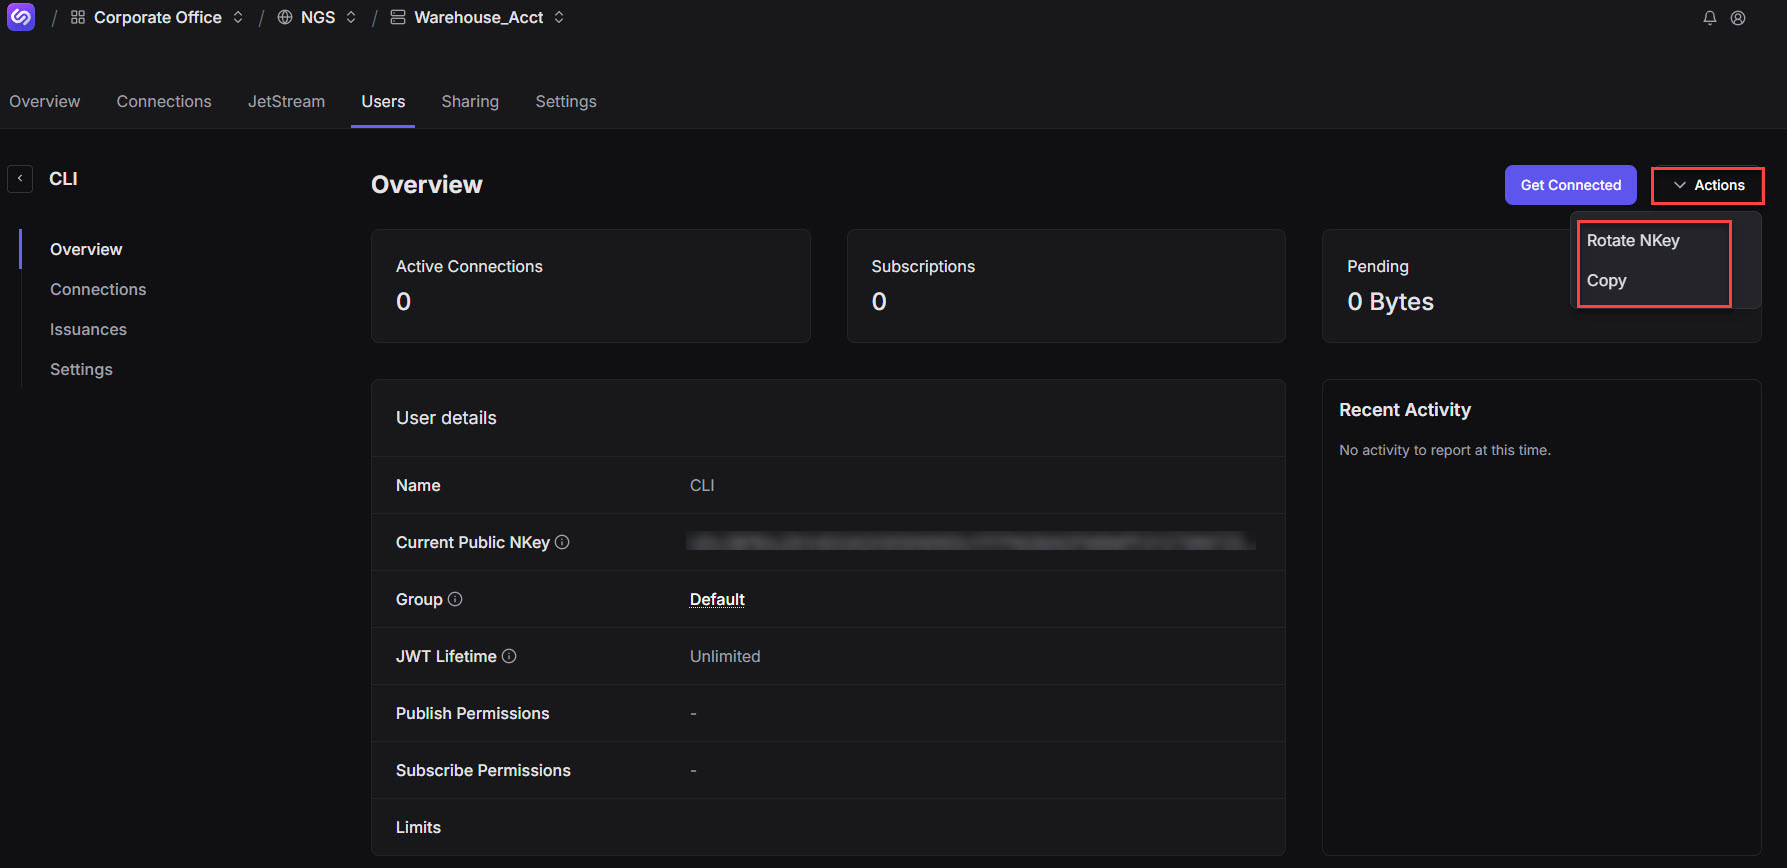
Creating users involves a range of security mechanisms such as rotating keys, minting keys, JSON Web Tokens (JWTs), NKeys, signing keys, and scopes. When you initially create a user (and before you Get Connected), a Current Public NKey is generated. You can use the Rotate Nkey (available from the Actions dropdown list box) to change this key. Rotating keys promotes security. You might need to rotate this key, for example, to comply with your corporate security policies. Copy, also accessible from the Actions dropdown list box, allows you to copy a user to a group. The user – in turn – inherits the Permissions established for the group, as described further below.
When you access Get Connected and choose CLI, Step 1 requires that you Download Credentials. The downloaded file contains the user’s JWT and NKey, which are used for authentication. Signing keys (which confirm user validity or authenticity) and minting keys (which ensure new security keys are always available for use) are used throughout the user management process.
Users
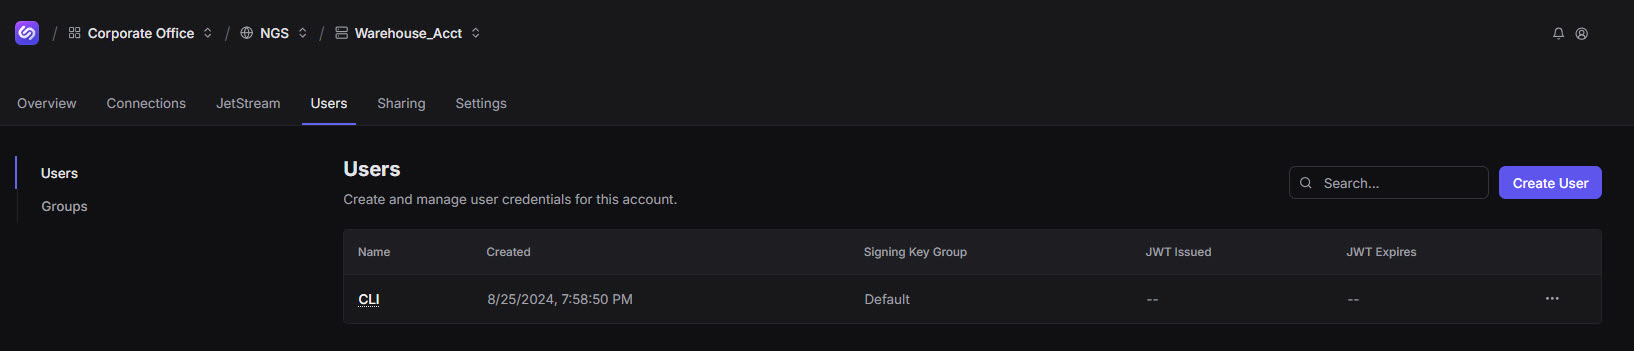
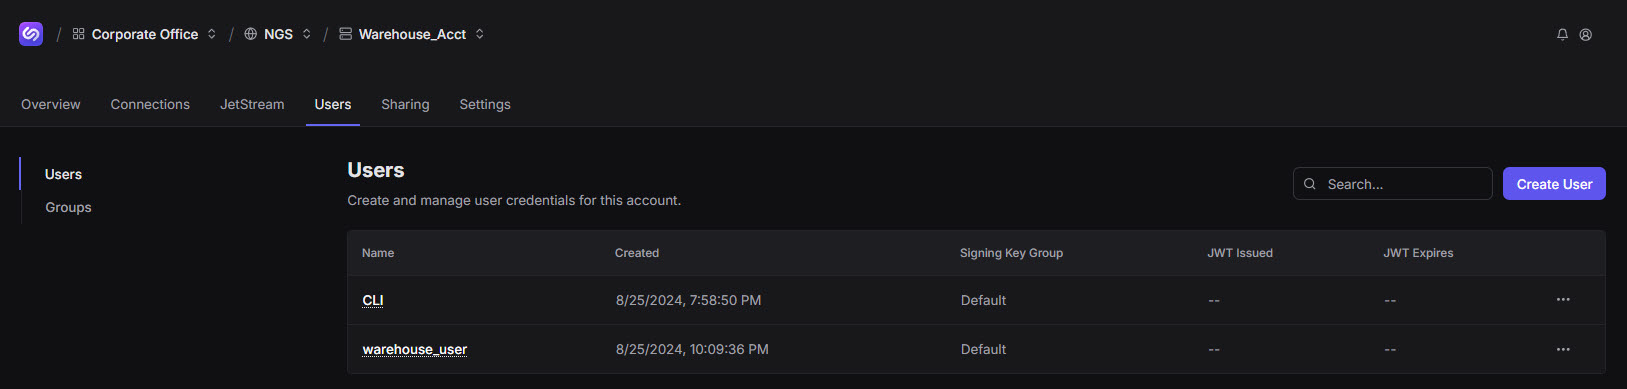
This tab allows you to create and view users. In our example, we add a user specific to an app that manages warehouse orders: warehouse. If adding multiple accounts, ensure you associate each user with the intended account.
To create a user:
Click an account from the Accounts window.
Click the Users tab.
Click Create User.
Designate your user parameters.
Save your updates.
The table displays the user you created.
Repeat this process to add users.
Overview
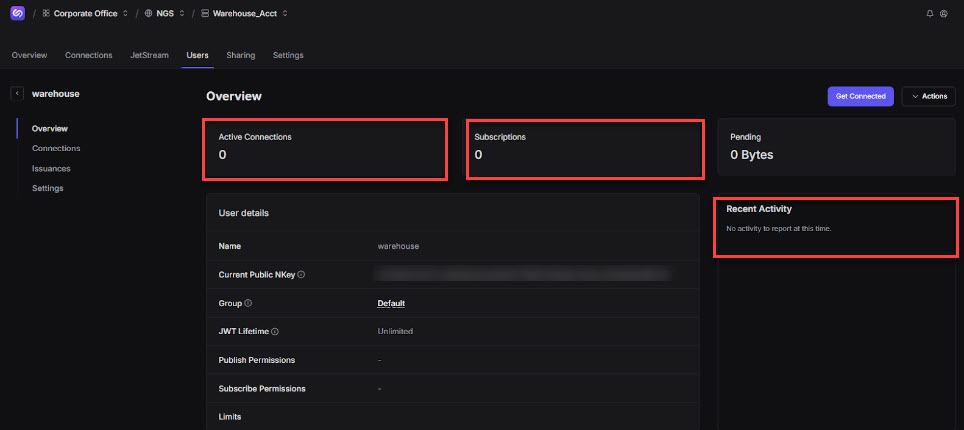
You can select an entry from the Users table to view additional information, such as Overview, Connections, Issuances, and Settings (available for selection from the left side of the window). In the Overview window, there are no Active Connections or Subscriptions. There is also no Recent Activity. Get Connected appears near the top right of the window.
Connections
You can view, group, and sort connections associated with this user’s credentials.
Issuances
You can view data specific to the User Nkey along with Limits such as Data, Payload, and Subscriptions.
Settings
This window displays the NATS User Name, Permissions, and Limits cards. You can also Delete the user. Settings allow you to further adjust configurations. If you change data associated with Publish, Subscribe, or Limits (which is embedded on the JWT), you must re-download the Credentials file. This action aligns with decentralized auth, which performs multiple checks to authenticate credentials.
Access
Paid subscriptions include Access, which allows you to invite collaborators. Assign Person allows you to provide someone with access to a specific user. You can invite a team member and provide this team member with access to a microservice, for example. Assign Person allows you to provide this access along with the ability to download credentials.
Groups
Groups allow you to organize users.
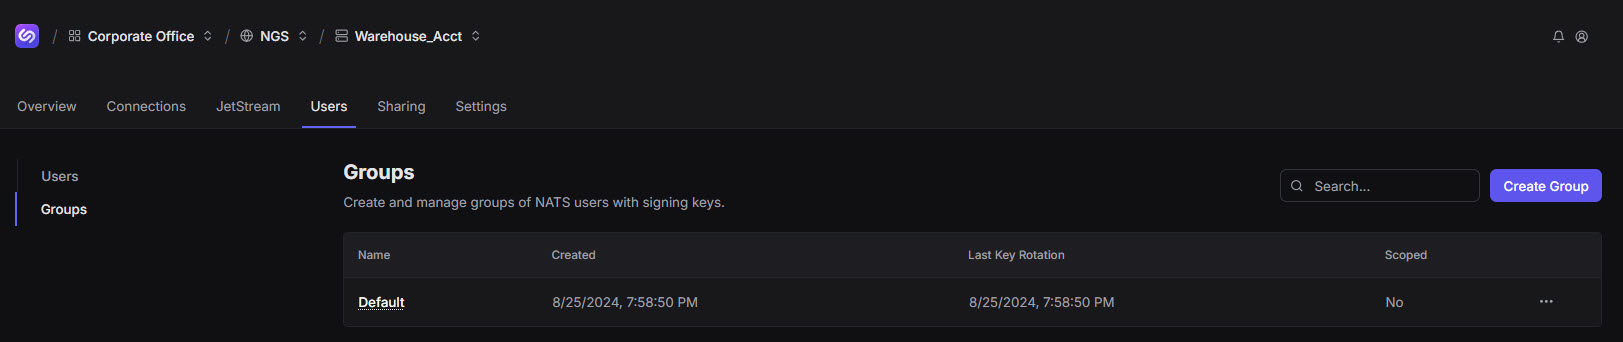
You have access to a default group. Clicking Default opens Signing Key Group Overview. This window provides additional information about signing keys and allows you to rotate them. You can create groups and manage permissions.

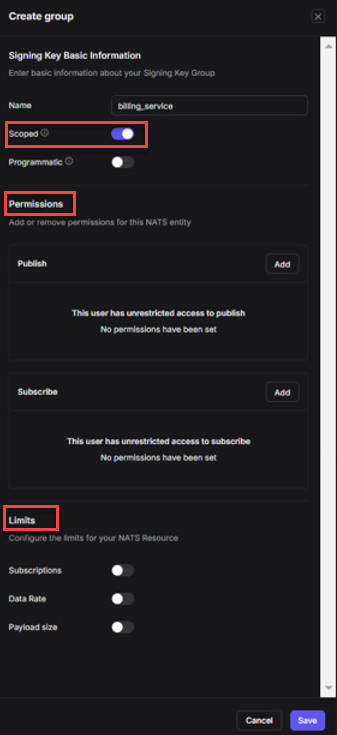
For scoped signing keys, users that you create within the same group will not have their own publish and subscribe permissions but, instead, inherit the permissions you establish in this Create group panel. For regular or standard (unscoped) keys, you can assign different permissions for each user in the group.
The Scoped (signing key) toggle, upon sliding to the right or ON position, reveals Permissions and Limits. You can set permissions to Publish and Subscribe. Grouping users allows you to rotate keys (and perform other actions) according to these groups. Permissions are dynamically assigned to all users in the group.
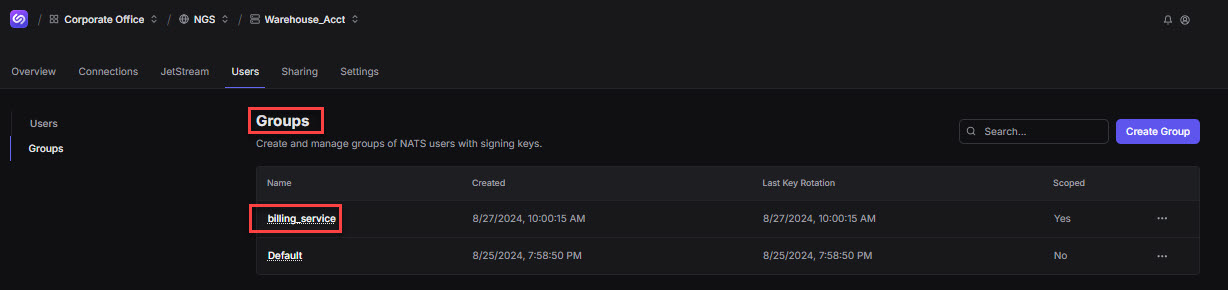
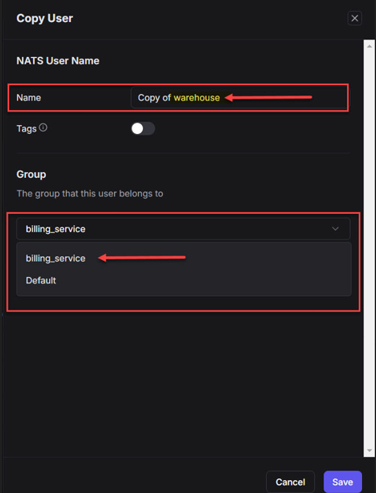
You can also copy a user to a group. The image above references the newly created billing_service group.
You can click Users from left of the Groups window, select a specific user from the Users table, then select Copy from the Actions dropdown list box – adding parameters from the Copy user panel (as depicted below). The Name defaults to Copy of user, which you can modify. Next, designate a group, such as billing_service, from the dropdown list box.
Get Connected
Prerequisites
NATS CLI installation
Access GitHub Releases: Scroll to Assets (click Show All) and choose appropriate OS .zip file, such as linux-amd64.zip or windows-amd64.zip
Recommendation: Unzip and save file content in its own nats-cli folder.
Cluster of NATS servers
Our default system is available.
Windows Subsystem for Linux installation (Windows users only)
For new users: Step 1 in the Get Connected window referenced below requires that you download a Credentials file. Save this file in your nats-cli folder, created as a prerequisite. If you did not create the nats-cli folder, save the Credentials file in the same folder as your nats-cli. You might also prefer to use environment variables.
For new Windows/PowerShell users: Step 2 in the Get Connected window requires that you copy a command statement. We recommend that you paste this command into Notepad++ (or similar editor), remove the backslash "\" separators, and use the Backspace key to ensure this statement appears on one continuous line. Equally as important, ".\" precedes this command (and others that you enter in your terminal). An example appears further below.
For new Linux users: In general, use a forward slash "/" as opposed to a backslash "\" when executing commands.
To establish a connection:
Click Get Connected.
A window by the same name opens, providing connection access via CLI, MQTT, or HTTP Gateway. In our example, we’ll use CLI (default). CLI allows you to connect using the command line. MQTT allows you to generate a Bearer JWT; MQTT also allows you to establish web connections. You can use a token to call our HTTP Gateway within Synadia Cloud, which also allows you to establish web connections.
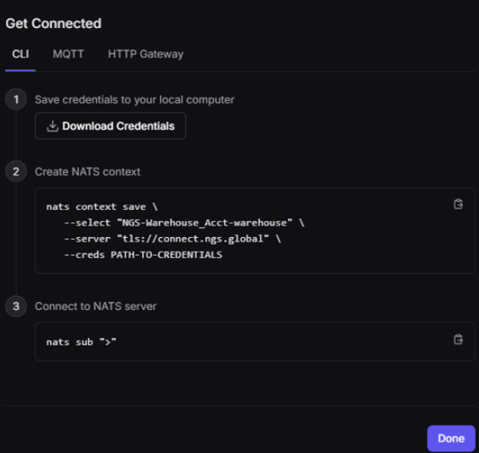
Step 1: Download Credentials We have downloaded and saved the file at:
C:\Synadia_Software\nats-cliStep 2: Create NATS context
The context contains:
SYSTEM-ACCOUNT NAME-USER
In our example, the context appears as NGS-Warehouse_Acct-warehouse; NGS is our System, Warehouse_Acct is our Account Name, and warehouse is our User.
Copy the code then paste into your terminal.
We recommend that new Windows/PowerShell users follow the instructions specified in the Note above. Also, leaving one or more spaces between sections of the command statement (as shown below) does not impact execution.
Example:
.\nats context save --select "NGS-Warehouse_Acct-warehouse" --server "tls://connect.ngs.global" --creds C:\Synadia_Software\nats-cli\NGS-Warehouse_Acct-warehouse.creds
The Connection: OK terminal message appears.
Step 3: Connect to NATS server by executing the command:
.\nats sub ">"
Subscribing on > confirms communication.
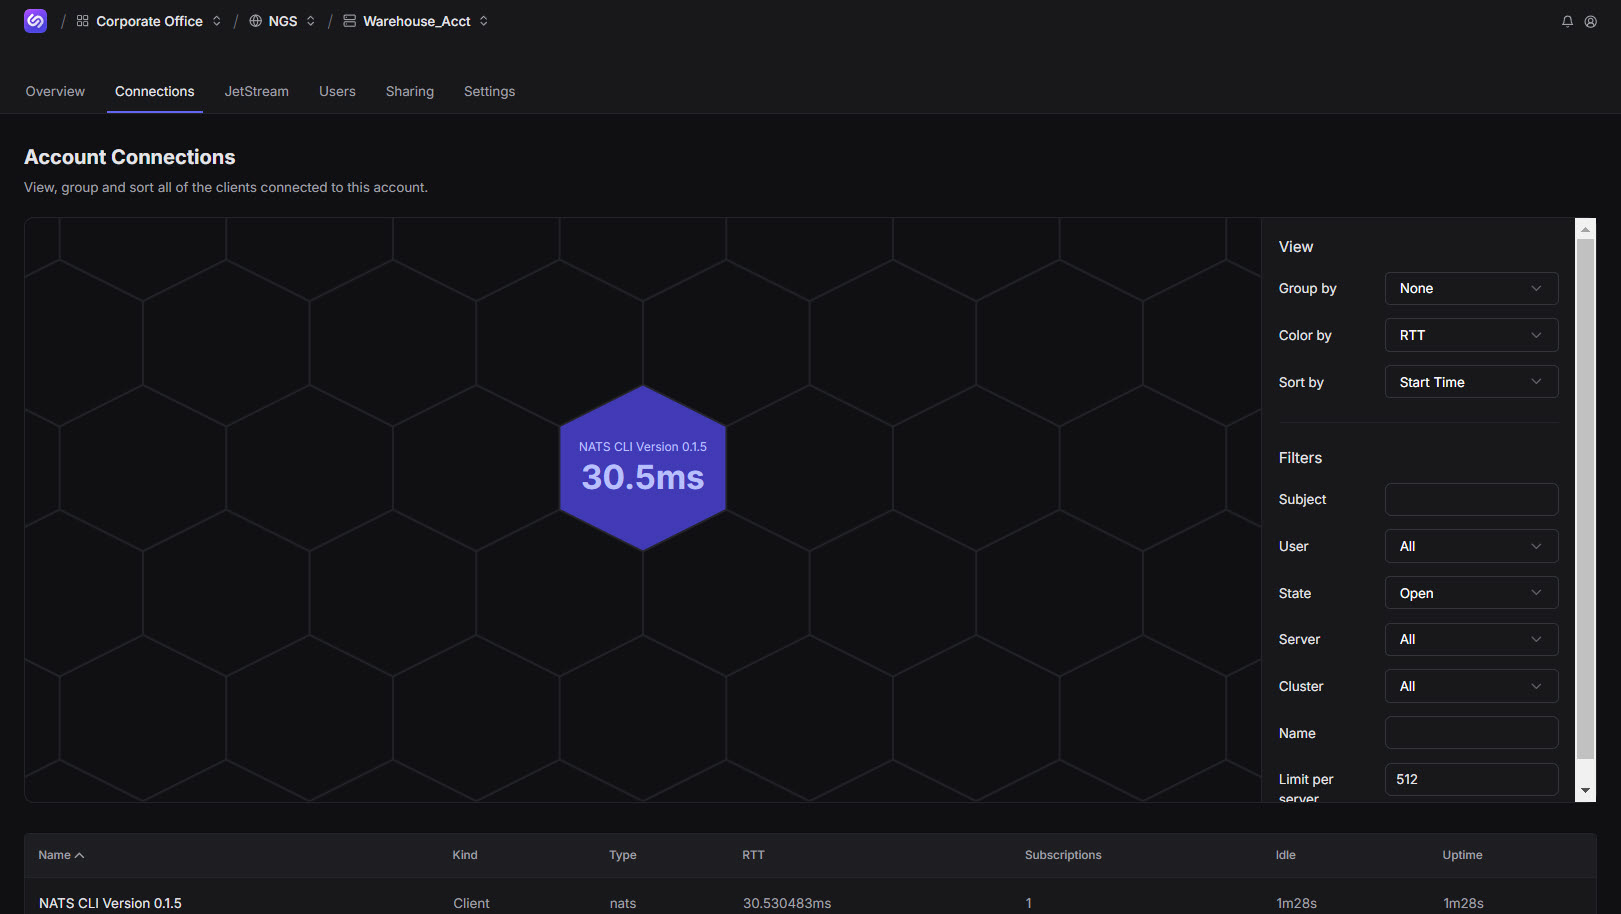
Return to the UI, click Done to exit Get Connected, and Refresh the now open Overview window to view data in Active Connections, Subscriptions, and Recent Activity.
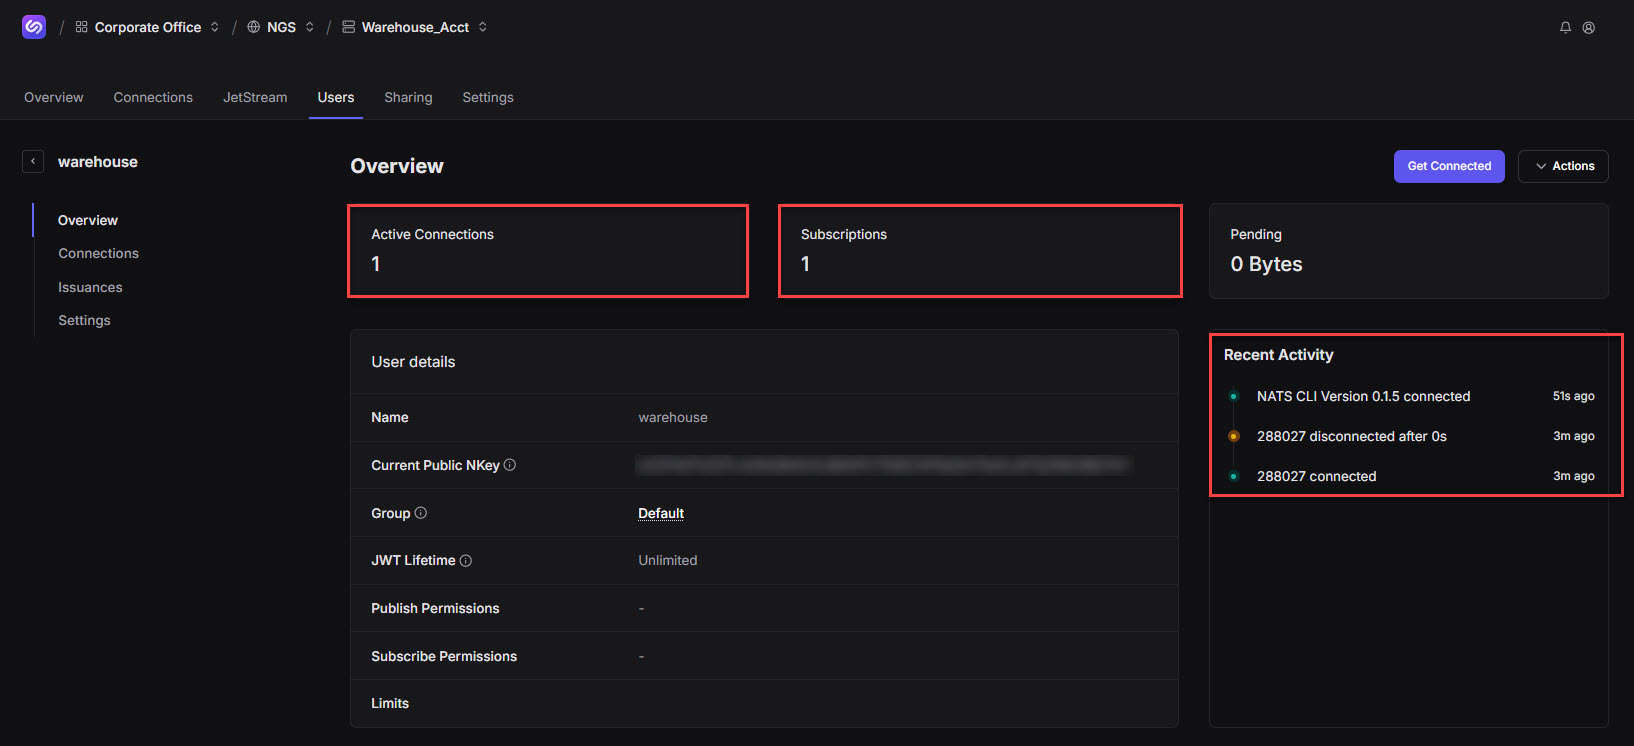
Click the Connections tab. The Connections tab also displays data.