

Synadia Cloud
Synadia Cloud Overview
Synadia Cloud is the SaaS offering that we manage. You subscribe to our solution, and we provide and maintain all infrastructure. Upon Synadia Cloud sign-up, you can view the dashboard and access the NATS super cluster. This default system, referenced as NATS Global Service (NGS), is synonymous with Synadia Cloud. This system includes a group of NATS servers on the same network that can reside in different geographic locations. The NATS servers allow you to send and receive messages with speed and efficiency.
With Synadia Cloud, you can:
- Access the dashboard.
- This user-friendly interface allows you to configure your system.
- Use Synadia Cloud (NGS), which allows you to connect to servers throughout the world.
OR
- Use a Remote System (add-on), which is your own NATS server and/or your own NATS cluster.
Synadia Cloud allows you to simply configure your environment – establishing your accounts, users, connections, and JetStream assets.
Context
Tier
All user guides align with the Personal/Free tier and provide a default system, user, and group. This tier also includes two accounts; one is a default. These resources are intentional because we want you to evaluate our solution to determine how it best accommodates your use case. This evaluation also enables you to determine the most appropriate billing plan.
Users vs Clients
Users commonly include apps, devices, or microservices. The users you create will depend on your use case. When you create a user, you download a Credentials file that allows your Synadia Cloud user to authenticate with the NATS server. We have specific tools available, such as the NATS Go Client, that allow you to connect to the NATS server by embedding this code within your app/device/microservice (user). This applies if your app, for example, is coded in Go. Similarly, if your app/device/microservice (user) is coded in Python or Java, you’ll use the Python Client or Java Client, respectively, to connect to the NATS server. We also support C, C#, Java, .NET, and Rust.
Add-ons
Synadia Cloud offers a range of add-ons that not only provide additional functionality but also enable you to customize our product. The Add-ons list is available on our Synadia Cloud website. You can choose your add-ons, make a payment, and begin using these features immediately.
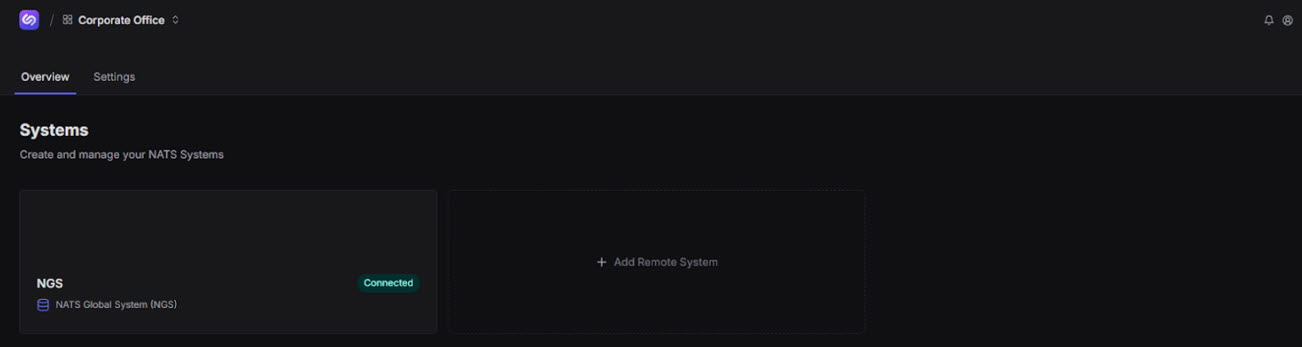
Remote System, for example, is an add-on. This feature allows you to use your privately deployed and managed NATS cluster and is available with all billing plans. With most billing plans, we host the system for you; however, this add-on enables you to host your own system. In this case, the number of accounts and other resources referenced in billing plans will not apply because you determine the number of resources you need. If you’ve not purchased this add-on, you can do so by clicking + Add Remote System on the dashboard.

This add-on displays the Add System button on the dashboard. Upon selection, you can choose Create System or Import System from the Add System dropdown list box.
Quick Start Workflow

We recommend that you, first, allow your Synadia Cloud user to authenticate with NATS. Access our Quick Start User Guide for instructions. After you have completed these instructions, we recommend that you navigate the remaining user guides as follows:
Scenario
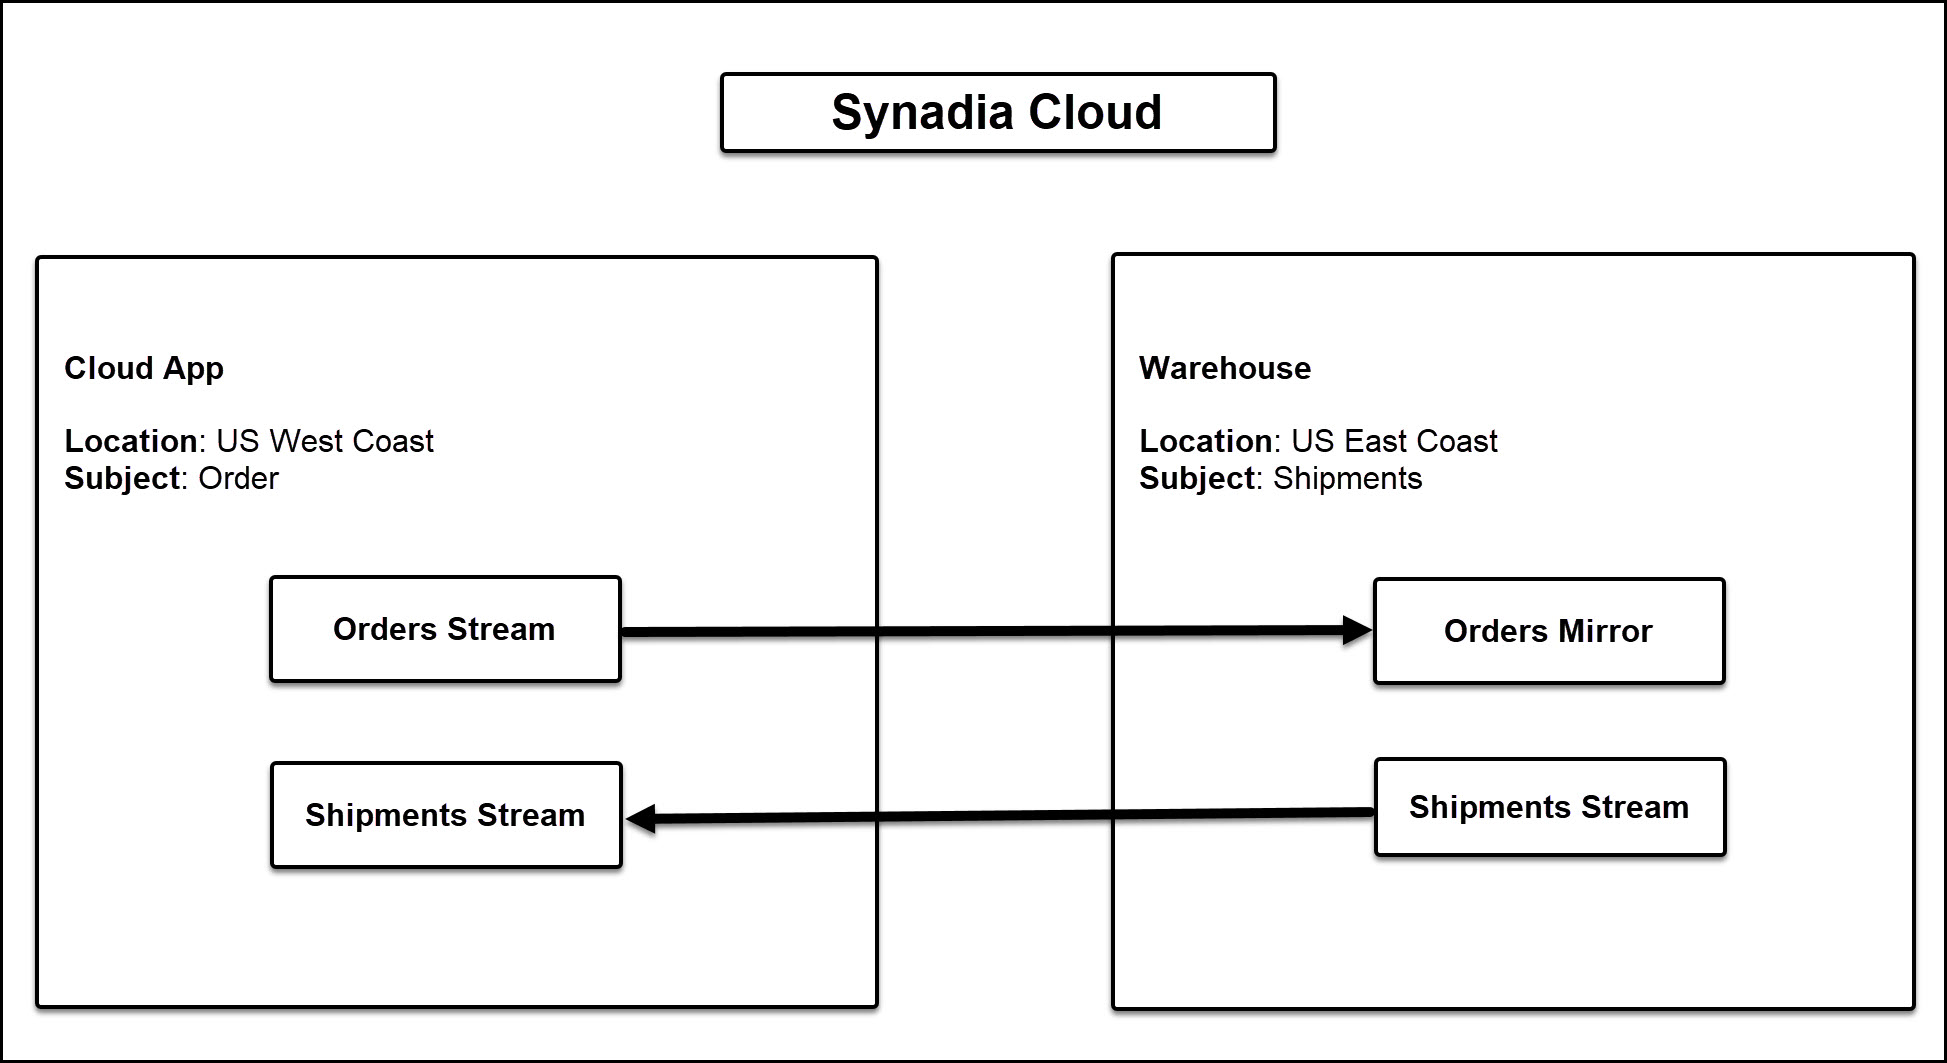
Our team created a tutorial video that describes a cloud app that receives orders then sends these orders to a warehouse. We use this concept throughout our user guides. Our example E-commerce app has a data center on the West Coast that receives orders. The app – in turn – ships these orders to the East Coast warehouse. The warehouse receives the orders and returns shipment information to the West Coast cloud app. As we move from one user guide to the next, we’ll configure this example app to incorporate NATS. Although we do not navigate the entire process described in the tutorial video, we guide you through creating streams that enable the cloud app to share data with the warehouse. While each user guide references this cloud app/warehouse example, this scenario is the primary focus of the JetStream Management and Cross-Account Sharing user guides.
Dashboard
The dashboard is the User Interface (UI) where you configure your system.
This Synadia Cloud Overview fully explains Accounts, Usage, and Settings, since they are not detailed in the other user guides.
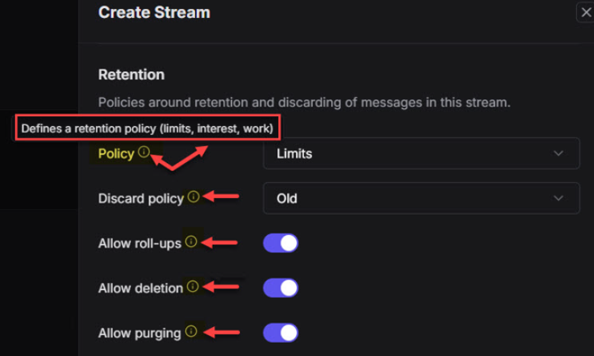
Many fields in the Synadia Cloud UI include tooltips, which indicate the content or value you’re expected to enter in these fields. Hover over each tooltip to view this information.
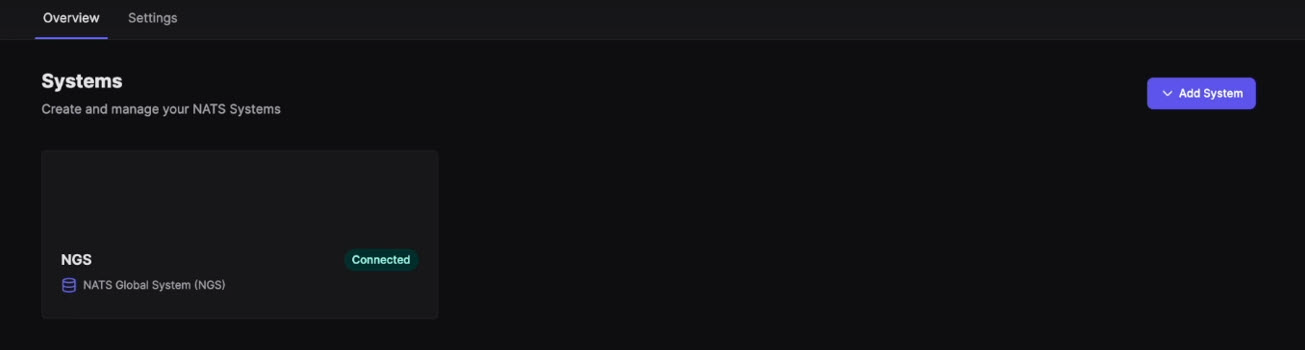
Overview
Systems
You create and manage your systems, which can include:
- NATS Servers
- Computers that run NATS (communications/messaging software), where data is sent and received. You might use a NATS server for small applications, for example, that do not require High Availability (HA).
- Clusters of NATS Servers
- Groups of connected NATS servers that communicate and share tasks. These servers work in tandem and can reside in different geographic locations. They do not have to exist on the same network but should exist in the same region. If one NATS server fails to complete tasks, others in the cluster complete these tasks and ensure there is no service interruption. These servers combined provide an HA environment with failover safeguards that prevent server downtime.
- NATS Super Cluster
- Groups of NATS servers on the same network that can reside in different geographic locations. The global NATS system that we host represents a NATS super cluster. You commonly use the NATS super cluster for larger applications that require multi-region, low-latency access. The servers provide an HA environment, which extends itself to global availability.
To access a system:
Click your system.
In our example, we use the Default NATS Global System (NGS). The Accounts window opens, allowing you to create new accounts.
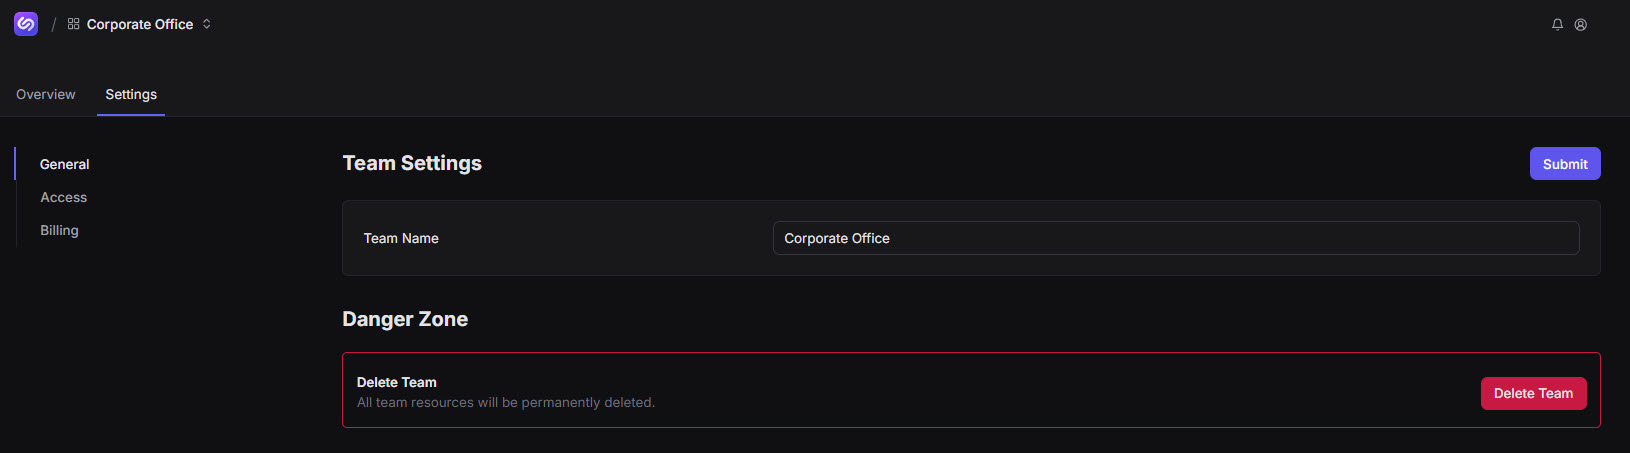
Settings
This tab includes:
- General – Allows you to edit your Team Name and Submit this updated information. Team Names do not have to be unique. You can also click Delete Team, removing the team and all associated resources.
- Access – Allows you to upgrade your team – adding new members.
- Billing – Displays the billing plans available for selection. High-level information is visible and available for review. While many customers choose our Starter tier, our Pro tier is the most popular. Access our Synadia Cloud website and scroll to Pricing Plans for complete information.
Accounts
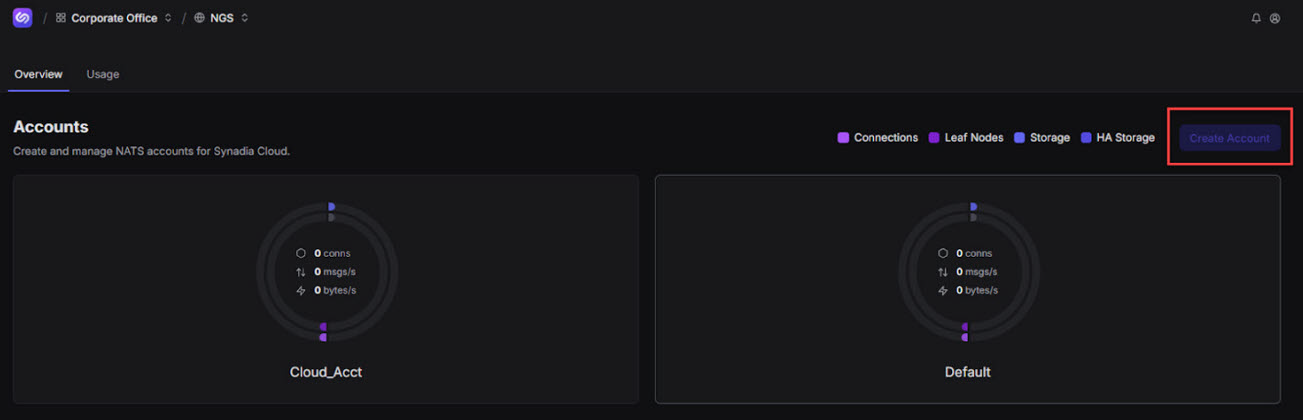
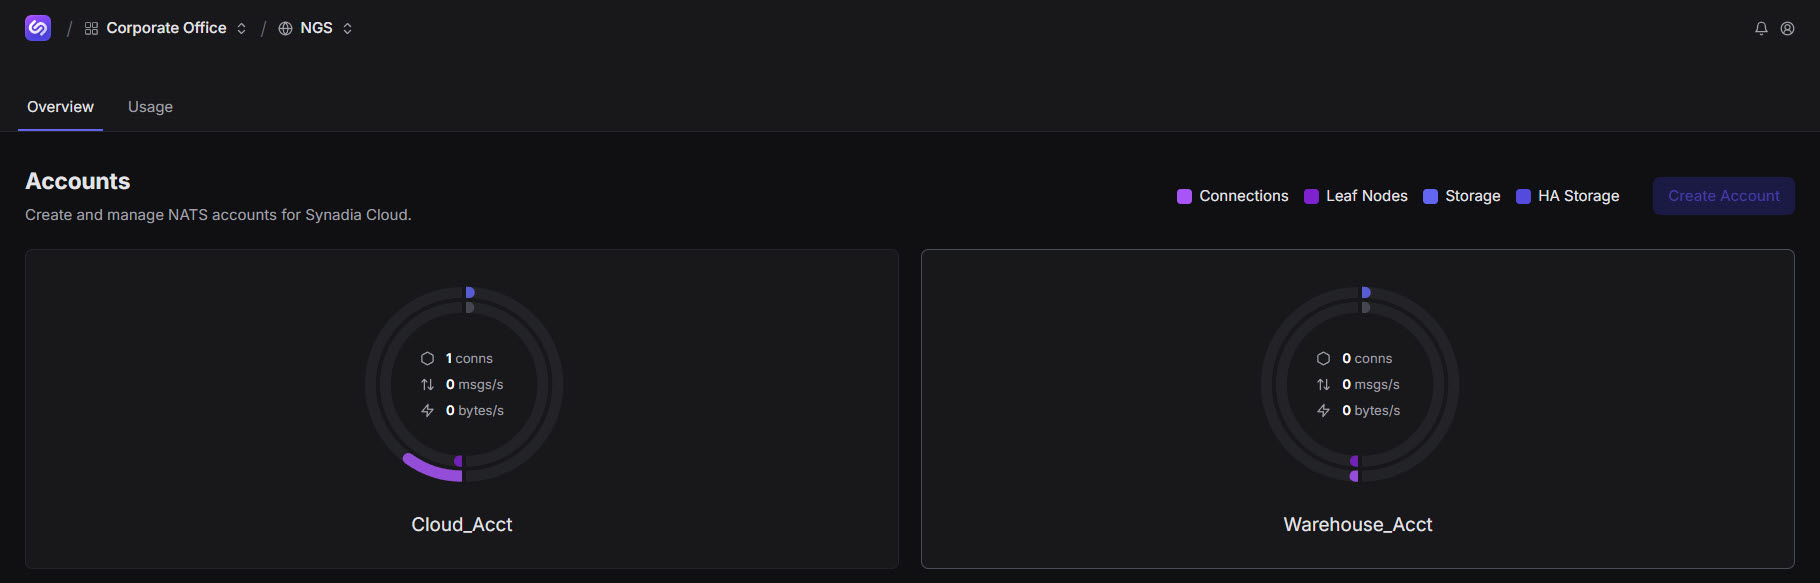
Accounts allow you to allocate resources and commonly include business functions (Order, Purchase, Ship) or reflect DEV/TEST/PROD environments. The accounts you create will depend on your use case. In our example, we add an account specific to an app that manages orders: Cloud_Acct. The number of accounts you create is based on your billing plan. The Accounts window includes a legend near the top right of the window. You can hover over the exterior circular account Default graphic, for example, to view analytics specific to Connections, Leaf Nodes, Storage, and HA Storage; you can also view Connections, Messages, and Bytes within this graphic.

Overview
To add an account:
Click either of the two Create Account options.
The Create Account button becomes disabled when you have reached your account limit, per your billing plan.
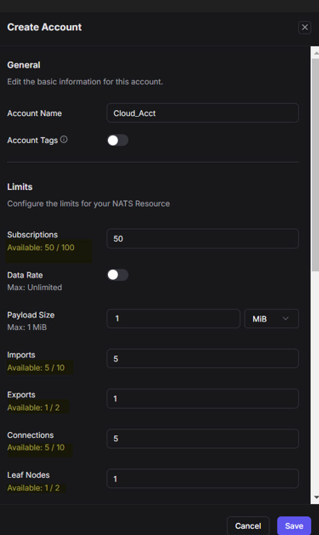
Designate your account parameters.
This panel contains the General, Limits, JetStream, and Standard Storage sections. The default values align with your billing plan. As you add panel content, pay close attention to Limits and Standard Storage. We have added UI text to promote storage and usage awareness.
Save your updates.
Create Account becomes disabled and unavailable for selection, as you now have two accounts in use. As a reminder, you can edit the Default account.
To view or modify an existing account:
Click the Default account or any account you want to view or change.
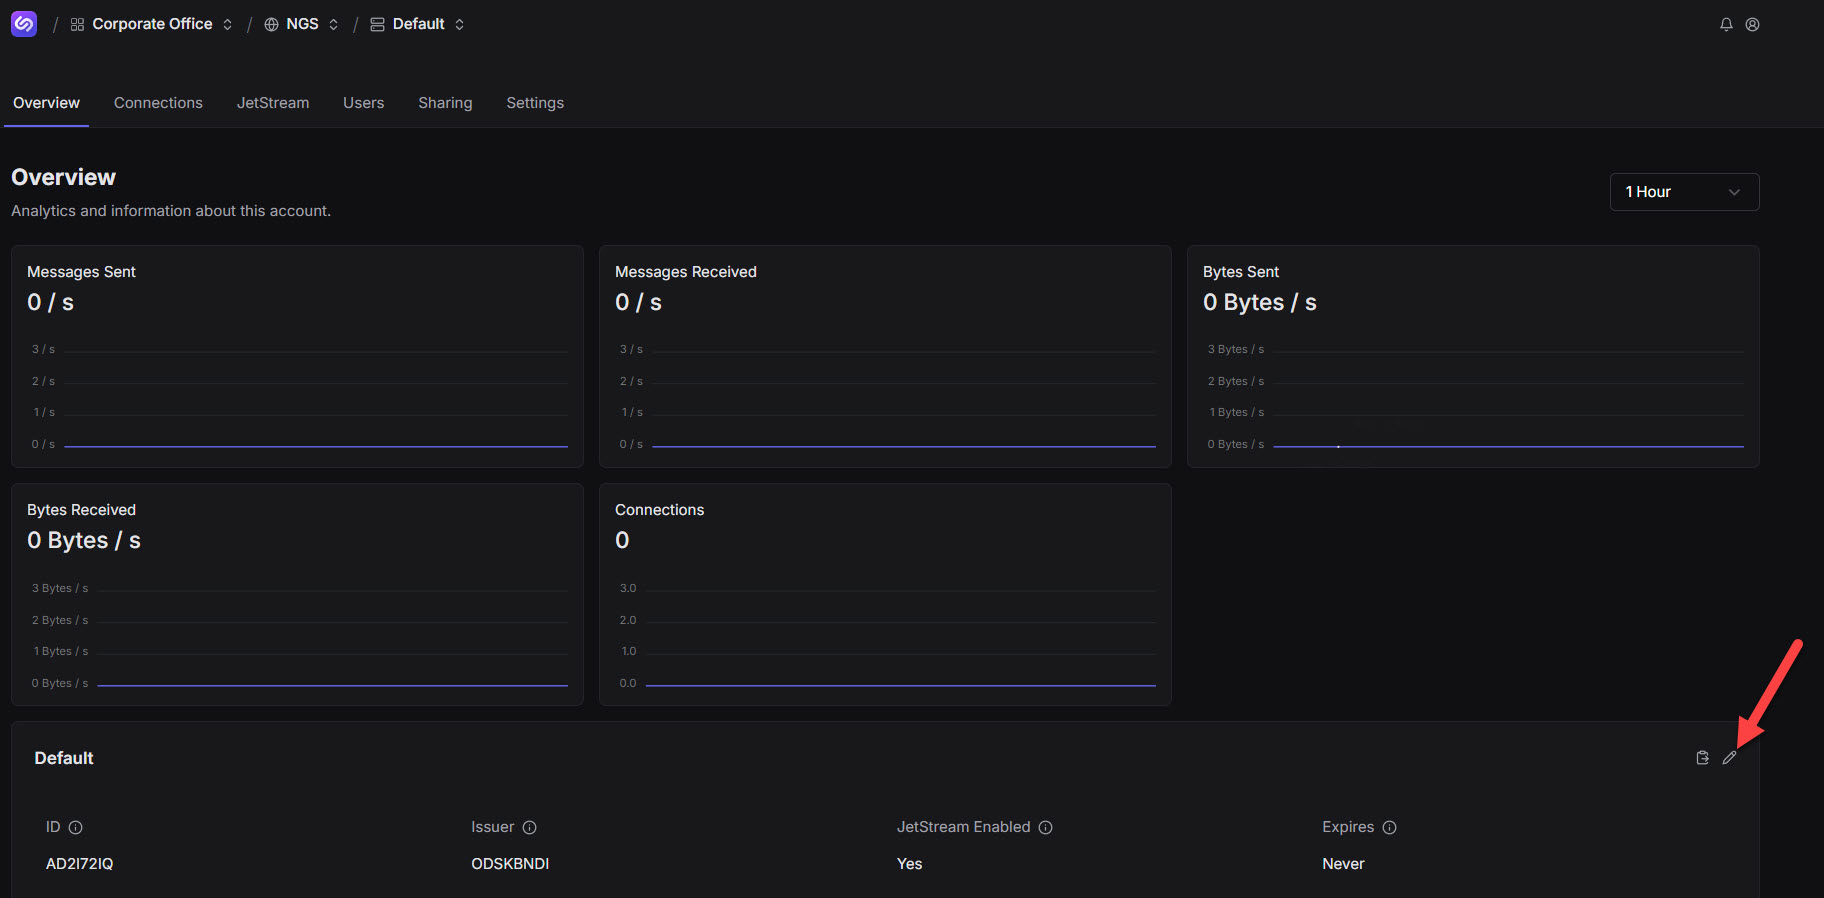
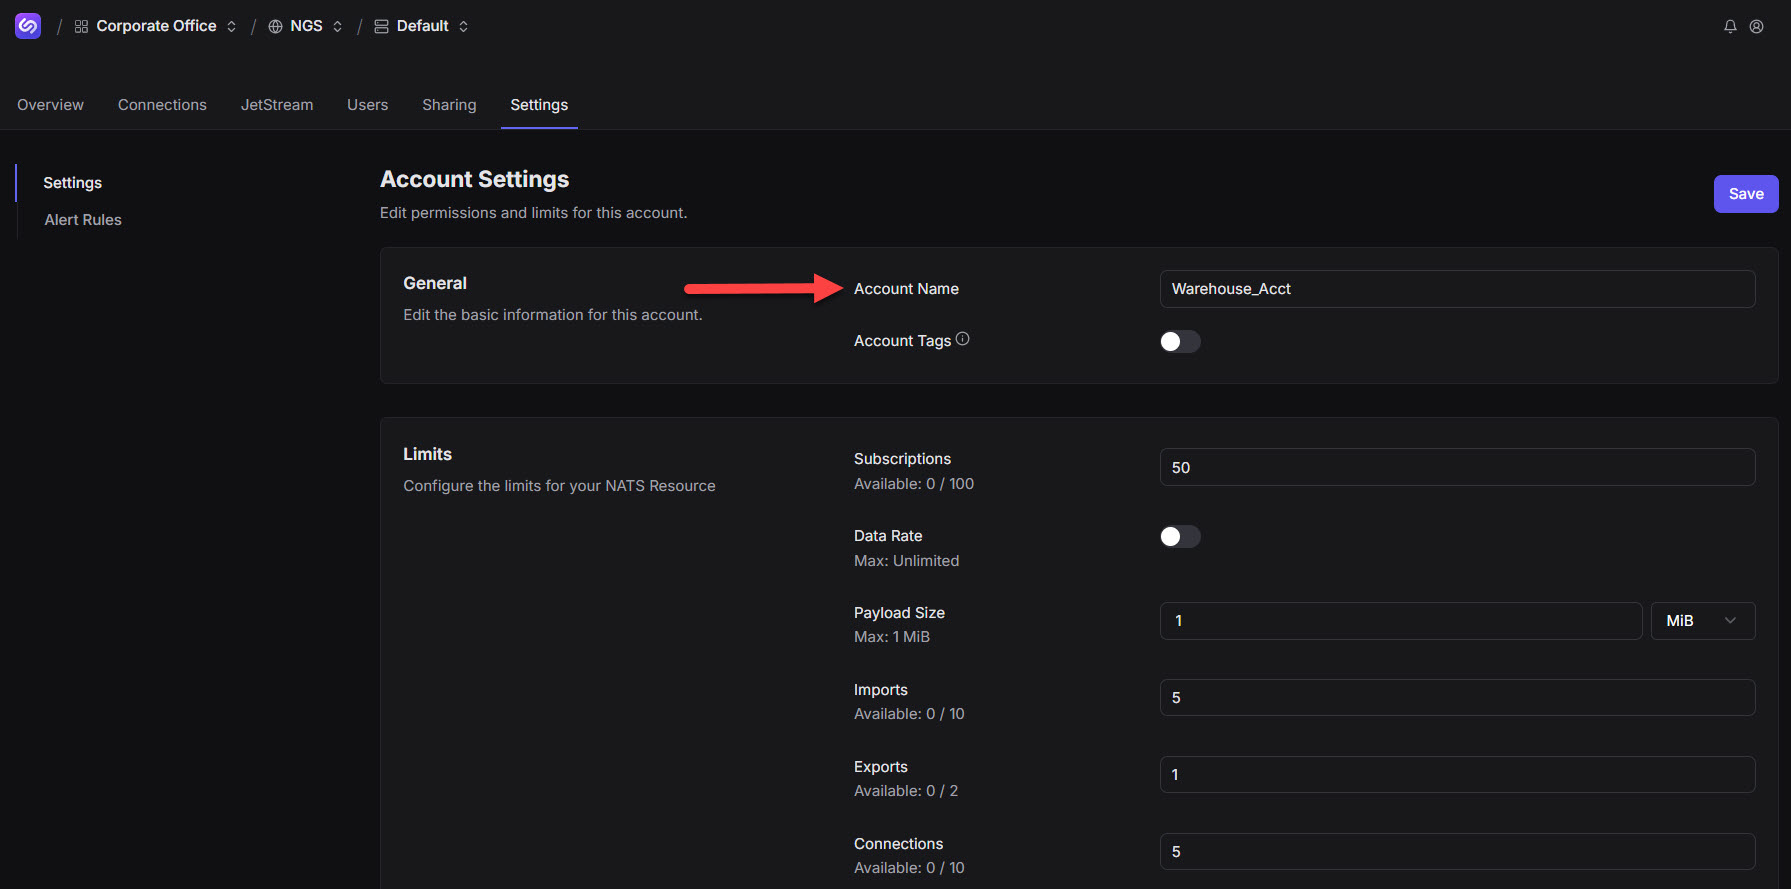
Click the Edit icon from the Overview window, change the Account Name, make any other necessary edits, then Save your updates.
Click NGS near the top left of the window to return to Accounts.
If you completed the instructions associated with the Quick Start User Guide, you might be able to view analytics here.
View data (as applicable).
Click an account to view additional information.
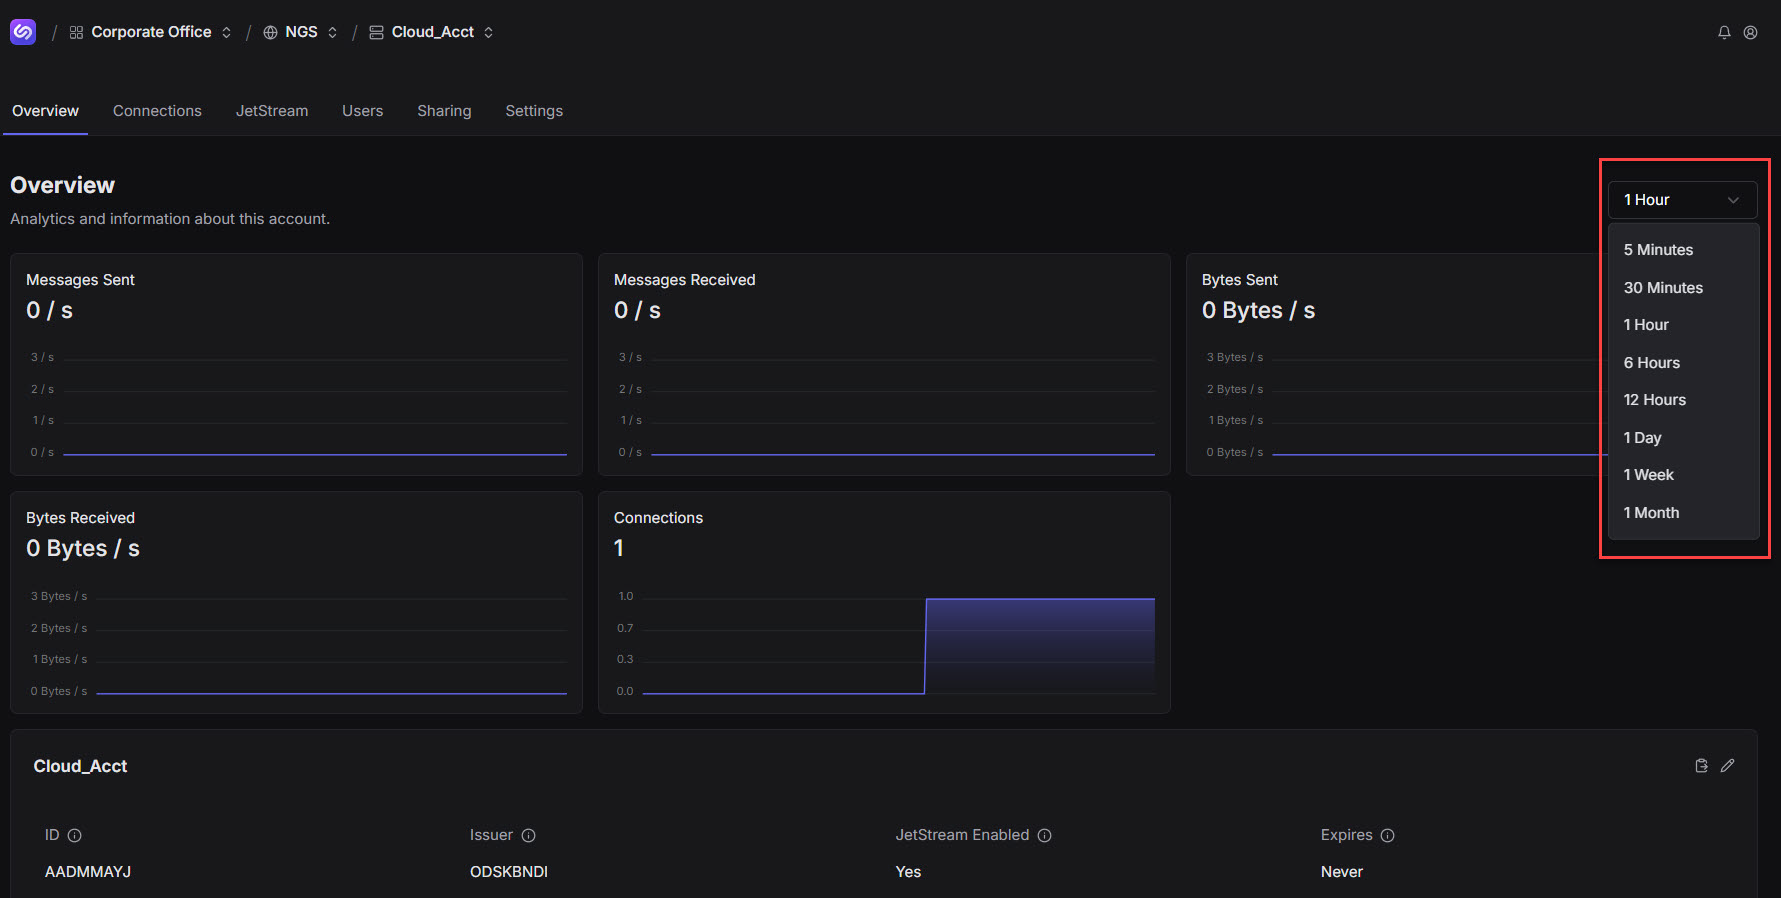
You can view Messages Sent, Messages Received, Bytes Sent, Bytes Received, Connections, and other details. The dropdown arrow (top right), upon selection, allows you to view specific activity time intervals. The default is 1 Hour. You might notice trends, for example, or observe spikes that might indicate that your application is sending more data than expected.
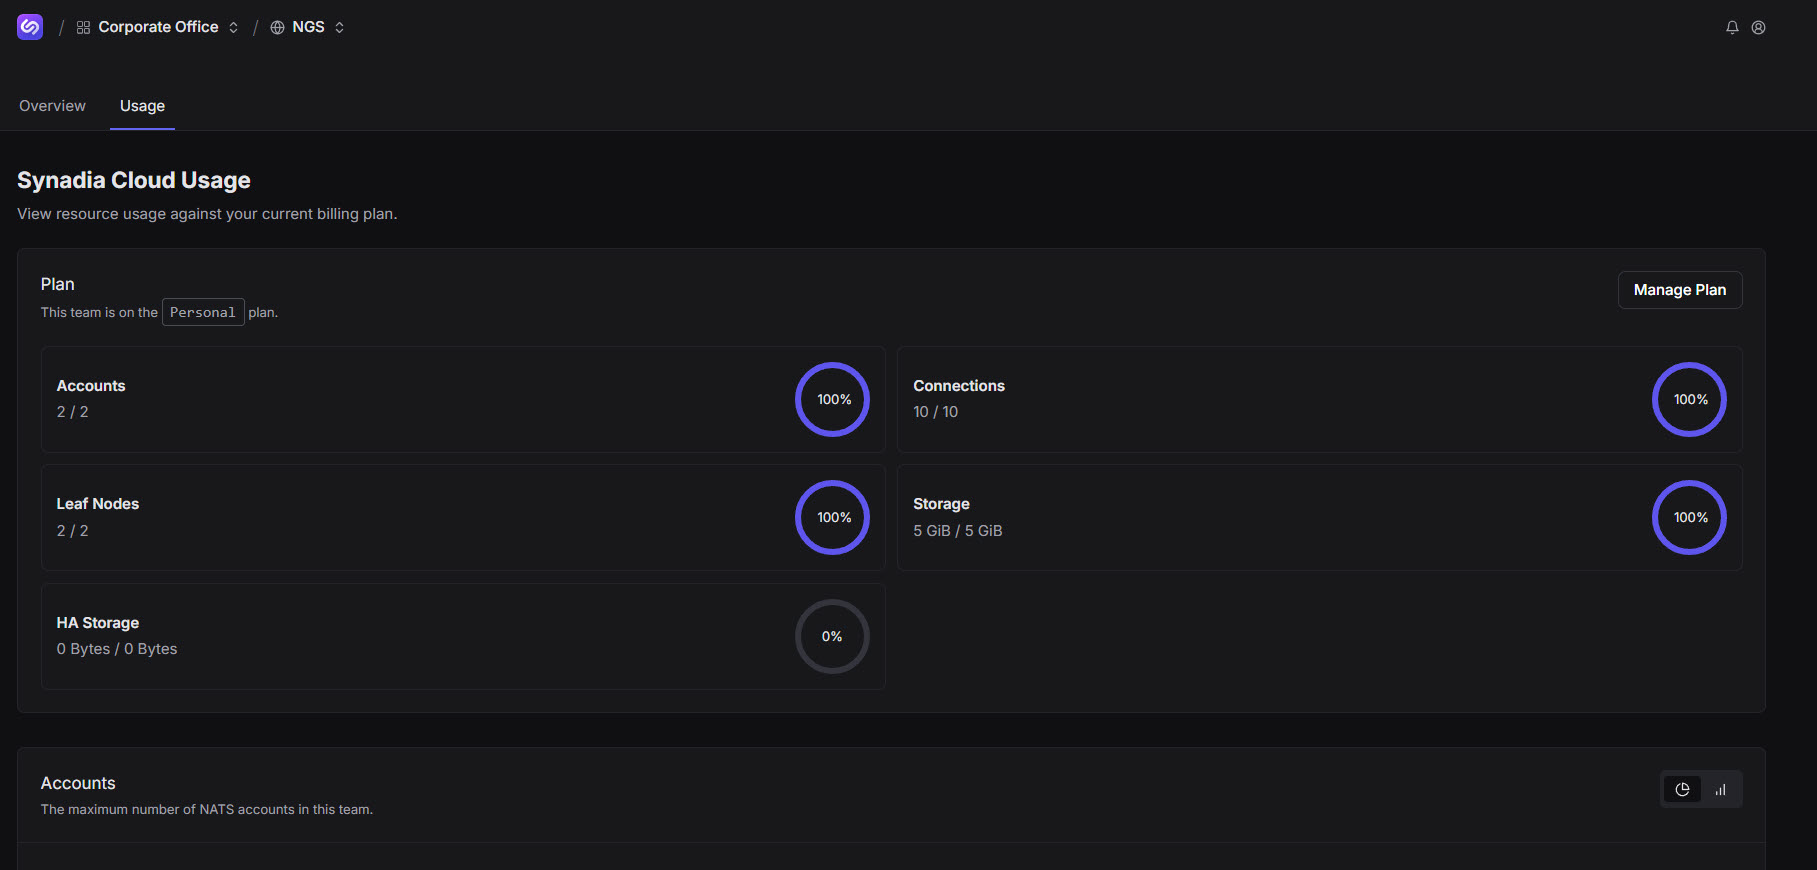
Usage
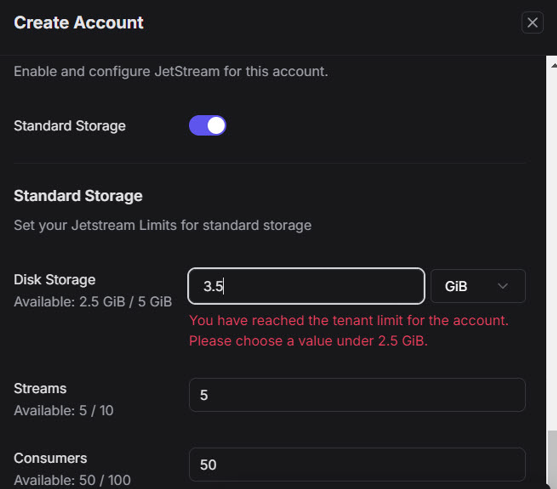
This tab allows you to compare your real-time resource usage to your billing plan, determining current resource availability. You must modify your billing plan and/or include add-ons to increase resources. If you attempt to exceed usage, a warning message displays:
If you have multiple accounts and are reaching usage limits, you can adjust/lessen usage in one account to accommodate an increase in usage for another. Since billing plans provide a total amount of Standard Streams, for example, you can divide this number across multiple accounts – increasing and decreasing usage such that a billing plan upgrade is not required. However, if you need to upgrade your plan, access our Synadia Cloud website and scroll to Pricing Plans. After you identify a plan, click Details and scroll to view add-ons and other options.
Features
Overview
This tab displays analytics and other account information.
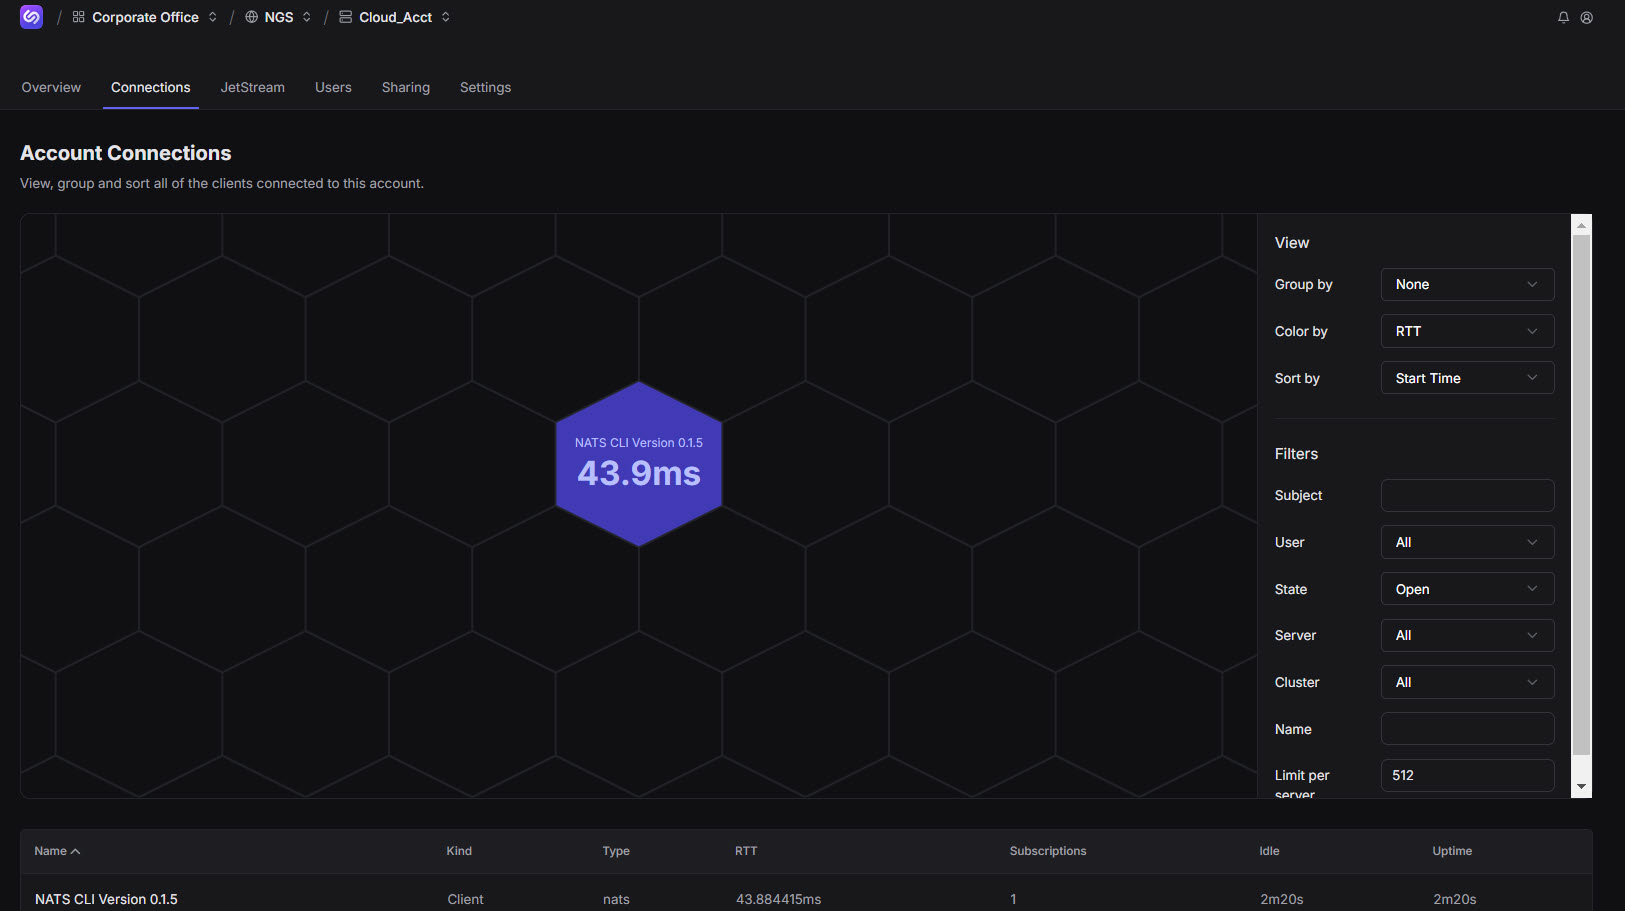
Connections
This tab displays the Connection Graph, which represents client connections to the NATS server. You can view, group, and sort connections. For a deeper dive, view the Connection Graph video or read the Connection Graph User Guide.
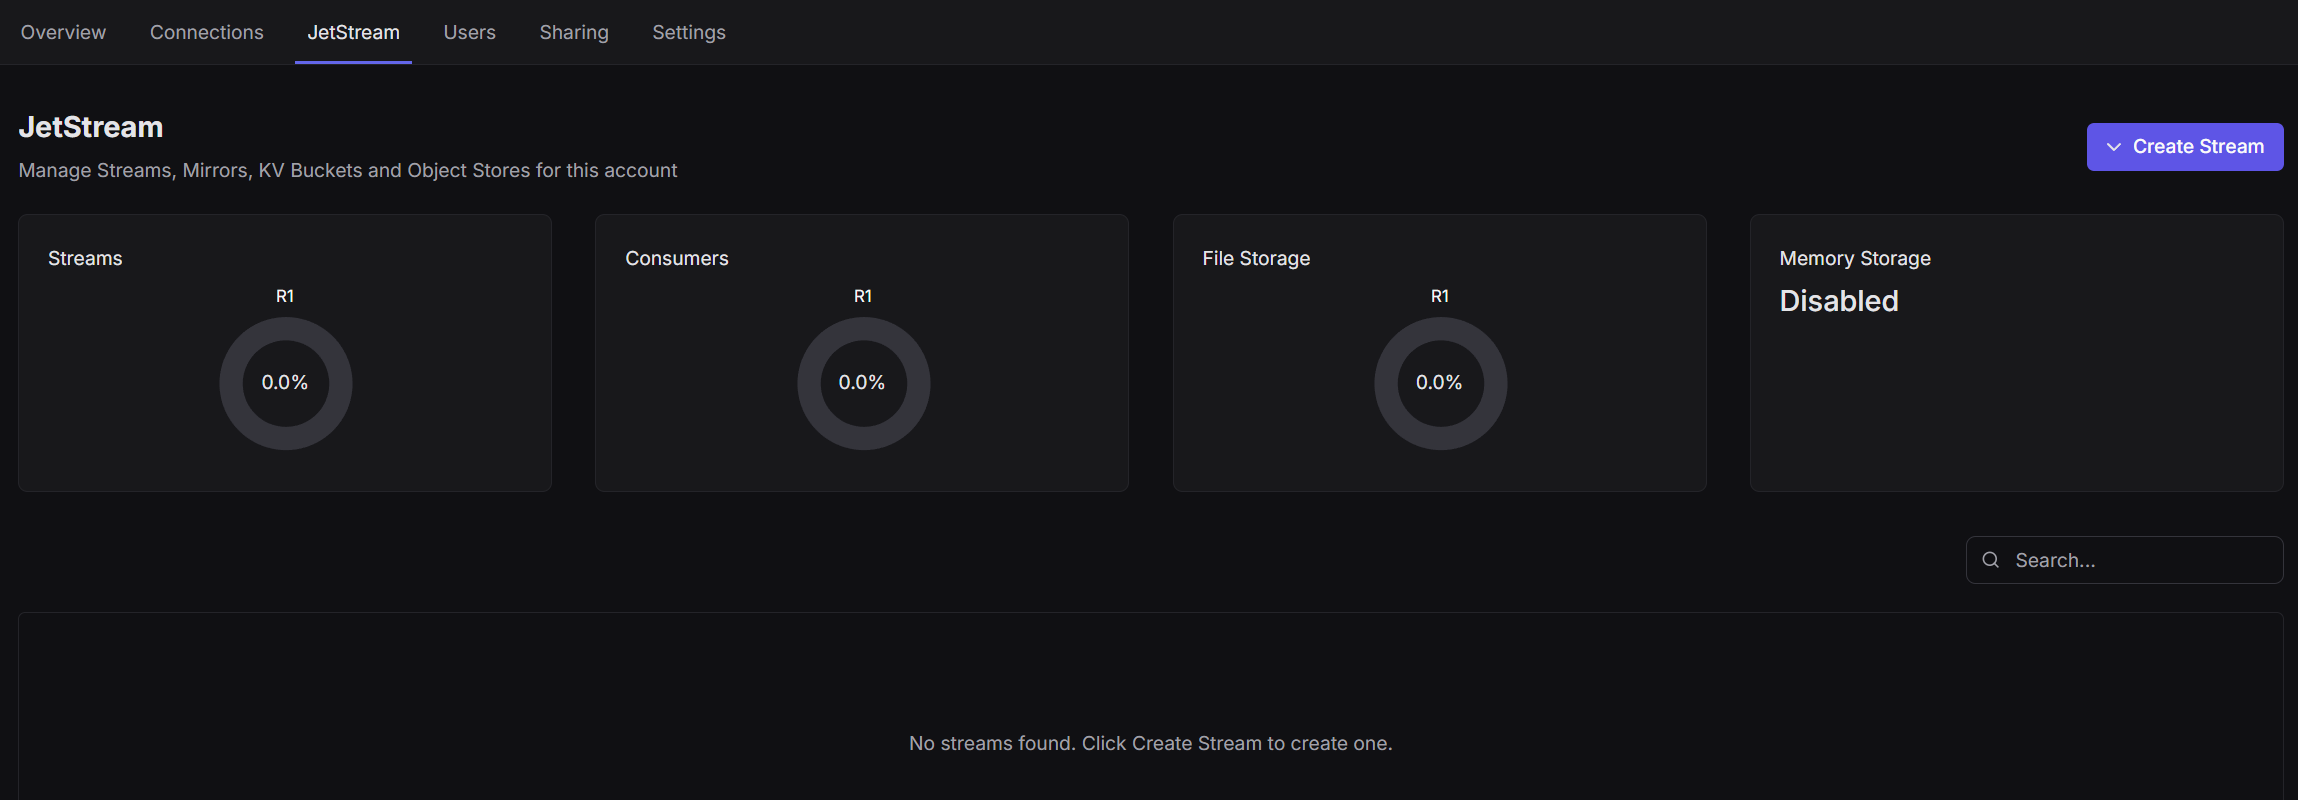
JetStream
The JetStream tab allows you to view account usage specific to Streams, Consumers, File Storage, and Memory Storage. You can monitor streams and enable Live Mode to view real-time messages entering them. You can also create JetStream assets such as Streams, Mirrors, KV Buckets, and Object Buckets. For a deeper dive, view the JetStream Management video or read the JetStream Management User Guide.
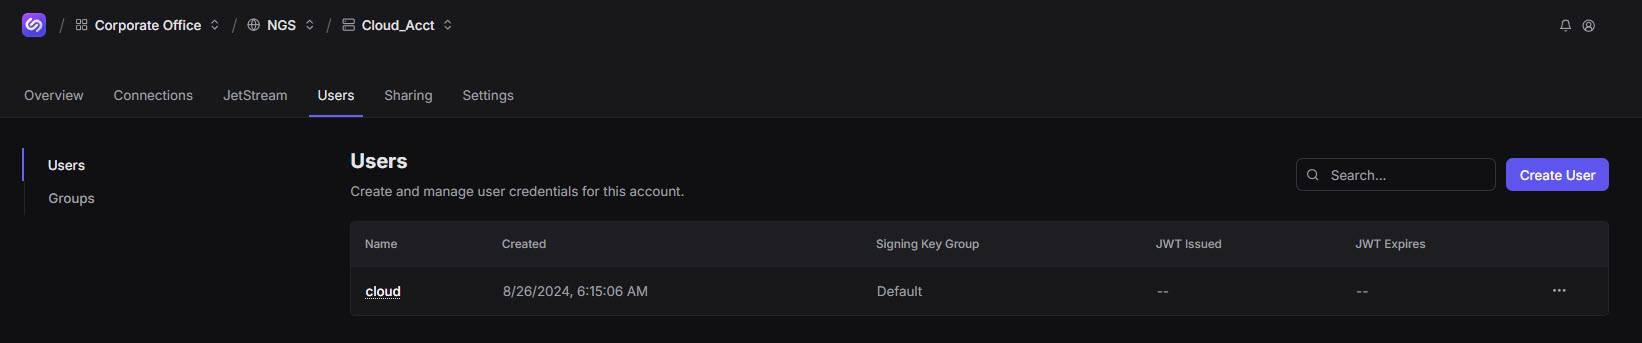
Users
This tab allows you to manage users and groups. Users represent client connections and might include apps, devices, or microservices. The users you create will depend on your use case. For a deeper dive, view the User Management video or read the User Management User Guide.
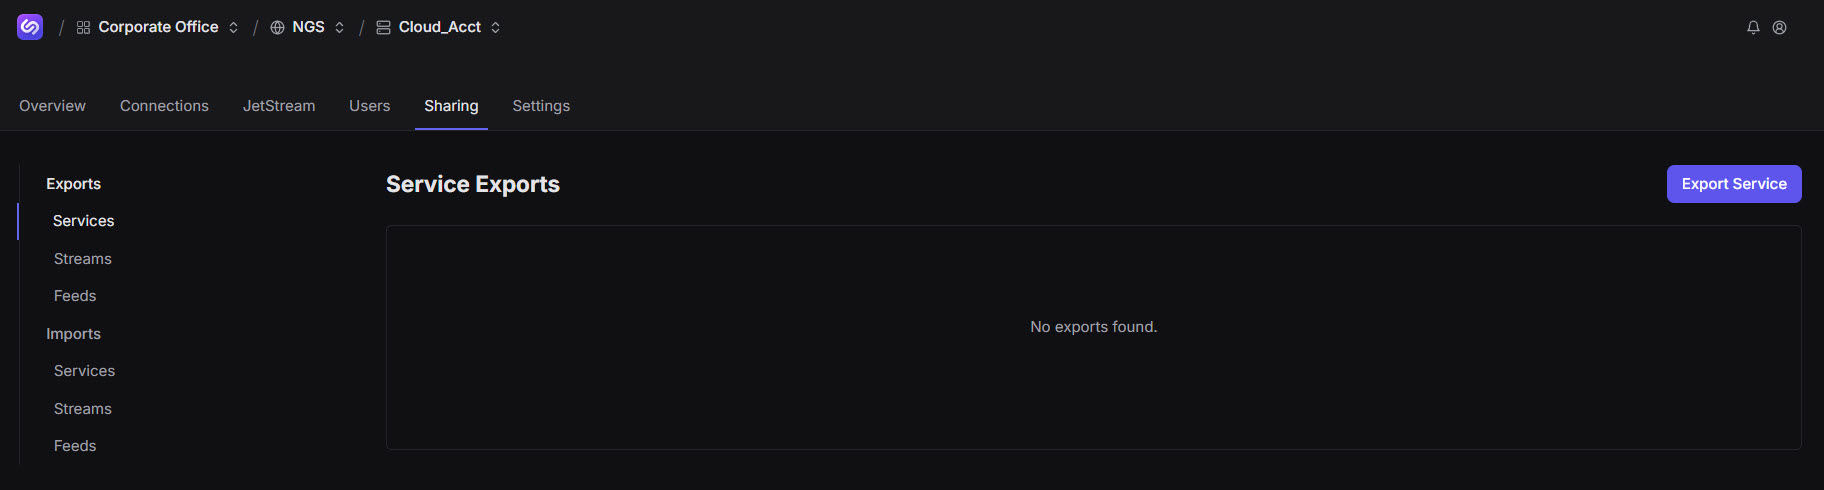
Sharing
This feature allows you to share Services, Streams, and Feeds across accounts. Since accounts are isolated, this feature presents an opportunity to share data. For a deeper dive, view the Cross-Account Sharing video or read the Cross-Account Sharing User Guide.
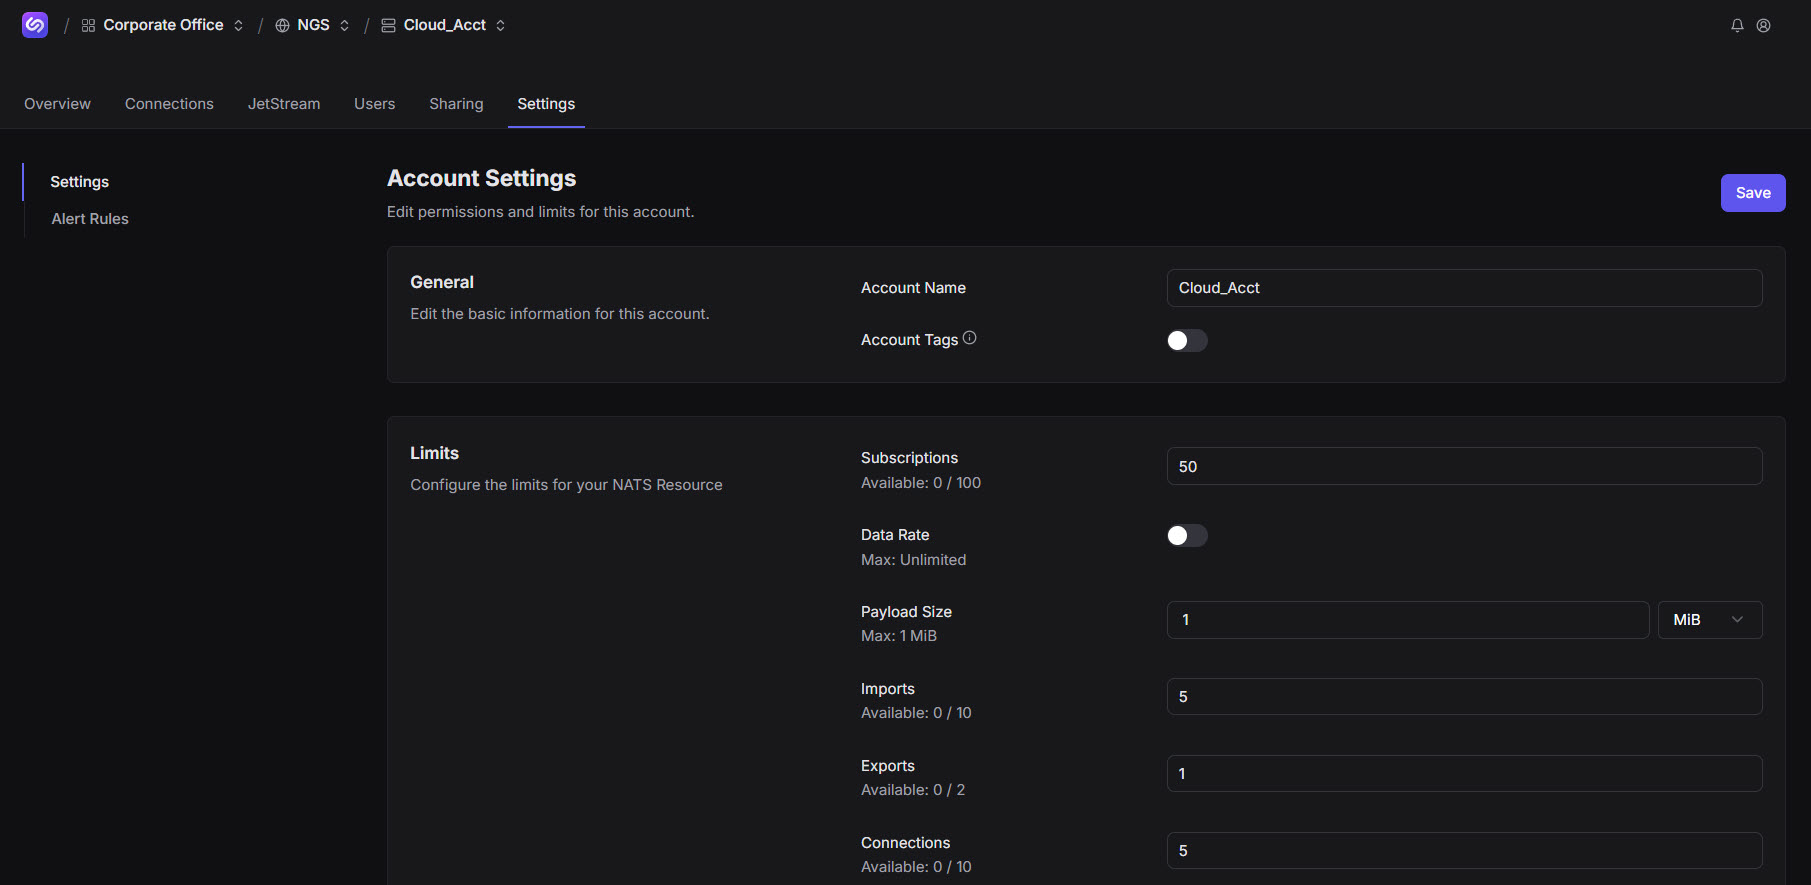
Settings
This tab provides access to Settings and Alert Rules. The Settings section includes the General, Limits, JetStream, Standard Storage, and Delete Account cards. You can edit permissions and designate limits for your NATS resources for this account. More specifically, you can manage account usage, adjusting these usage values against the usage values associated with other accounts. Managing usage across accounts allows you to increase and/or decrease usage as needed to remain within the confines of your billing plan.
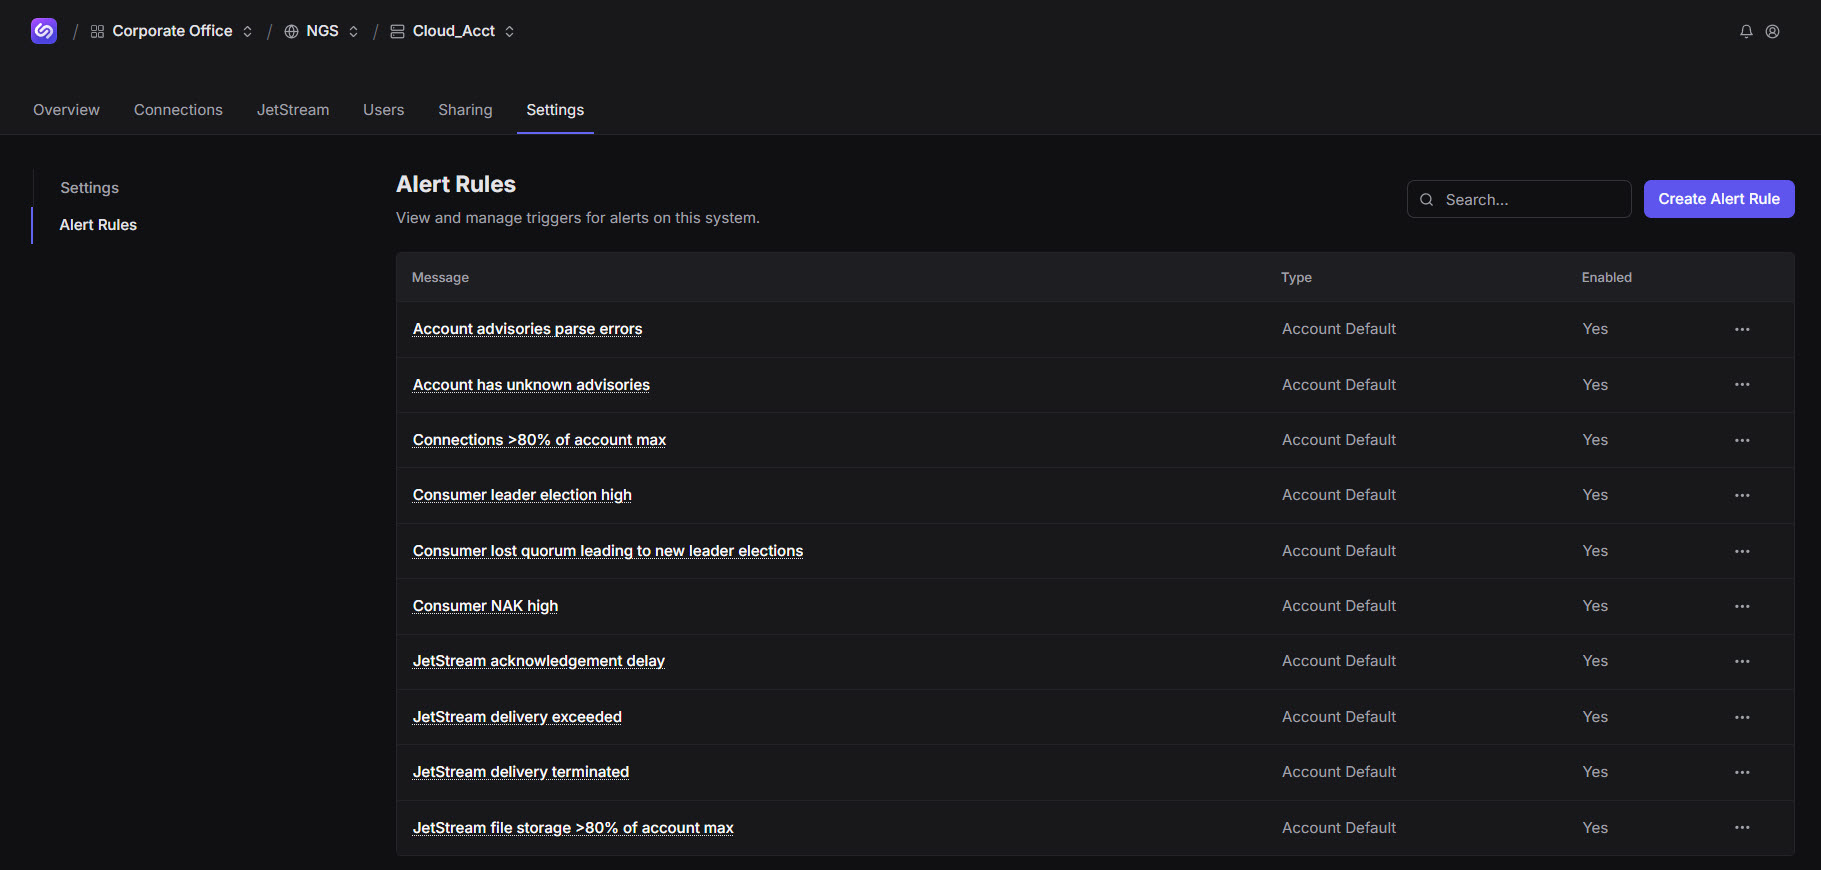
Alert Rules
You can view and manage triggers for alerts on this system.
Selecting a Message displays the Alert Rule Overview:
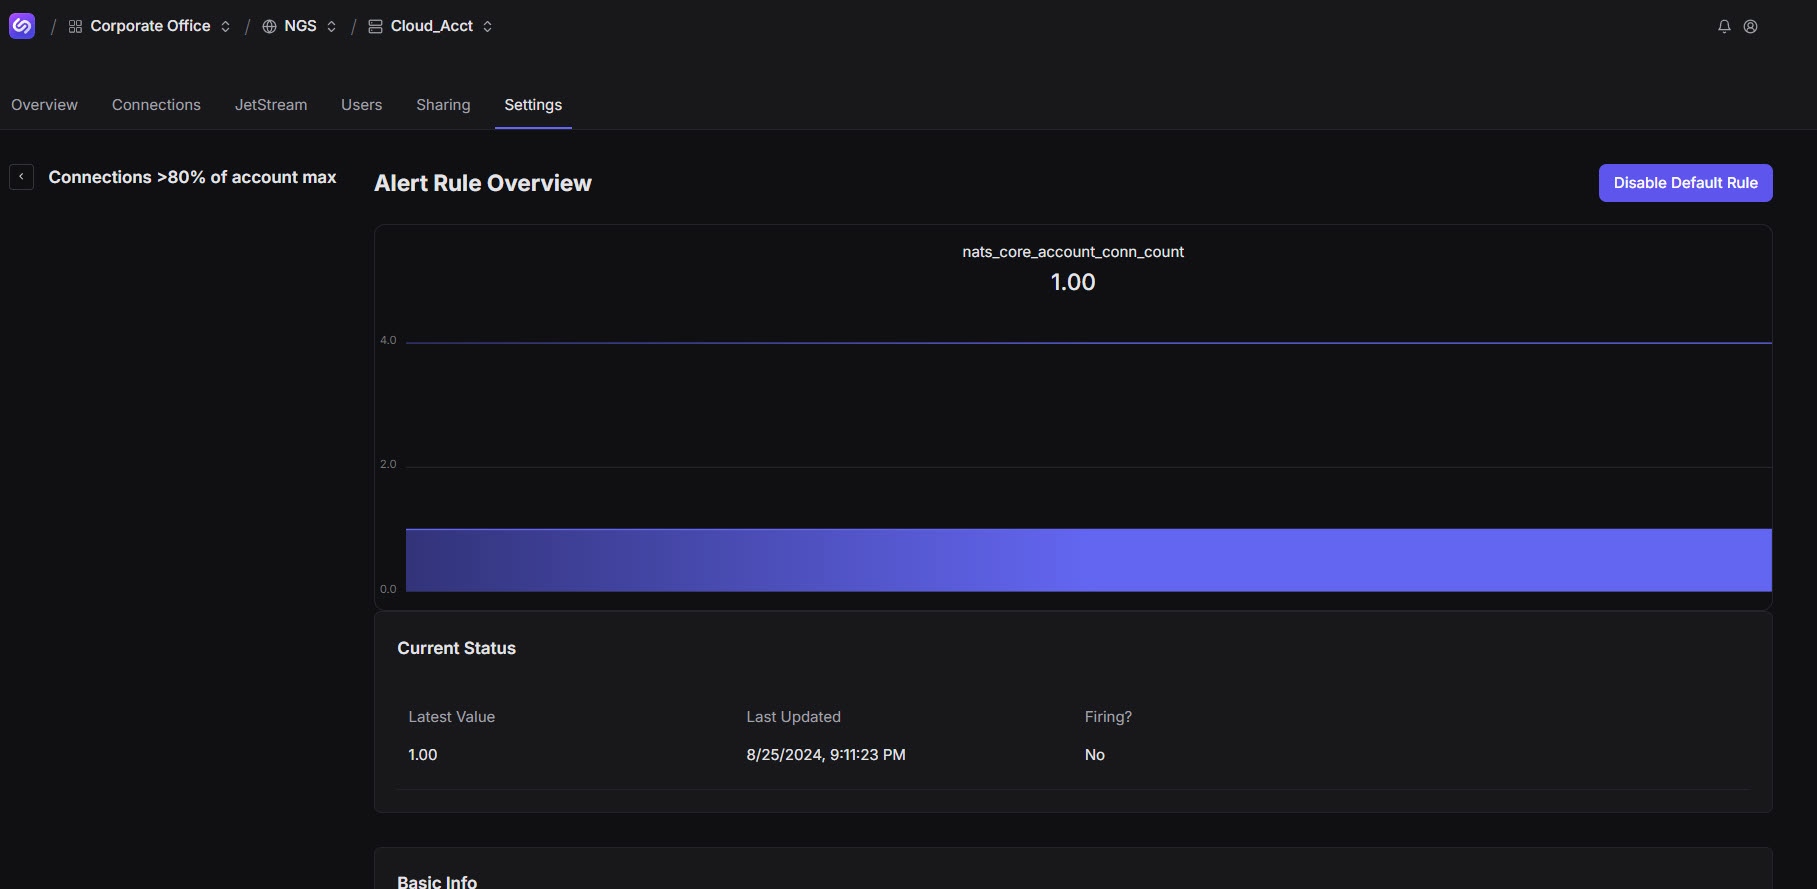
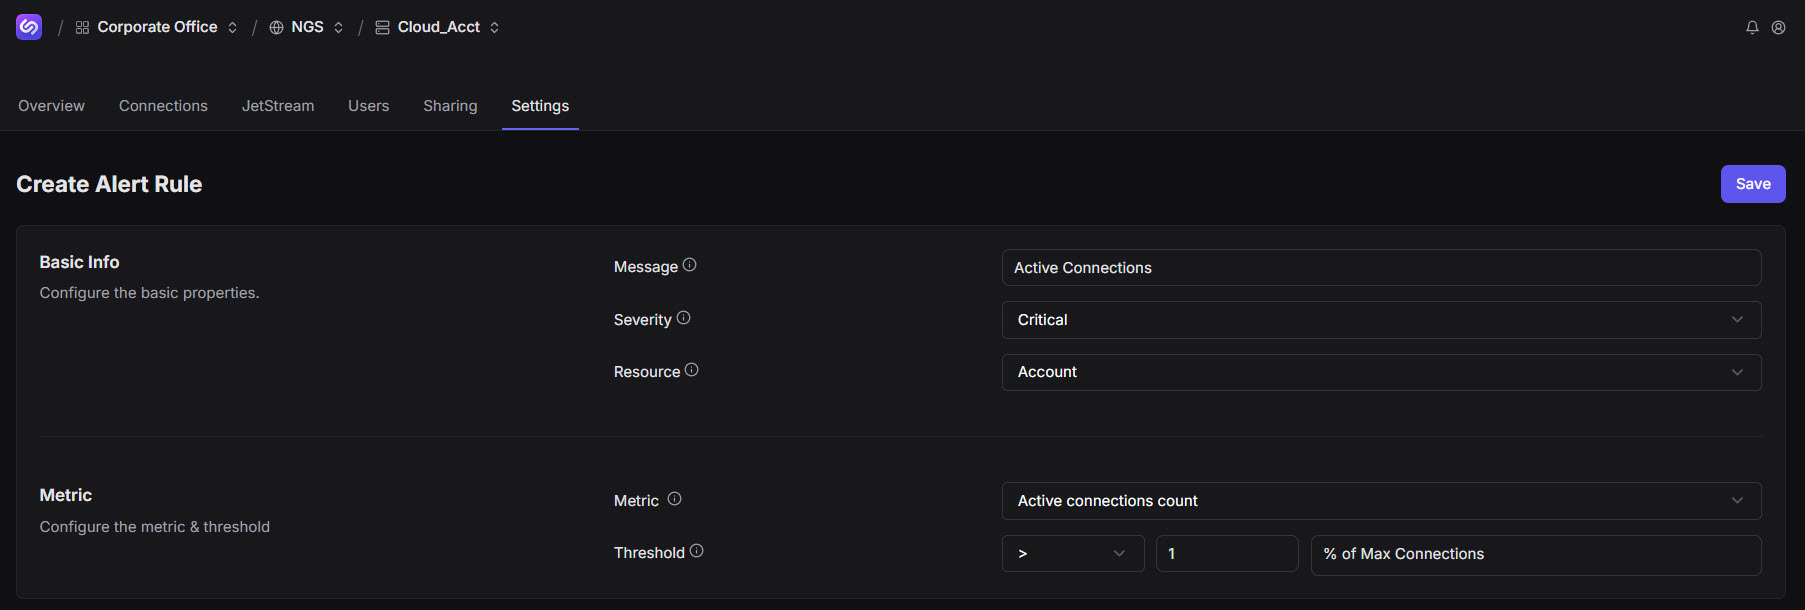
To add new rules:
Click Create Alert Rule.
Designate your Alert Rule parameters.
Save your updates.
Your new alert appears in the Create Alert Rules window. You can click this and other table entries to view alert rule details.
Profile
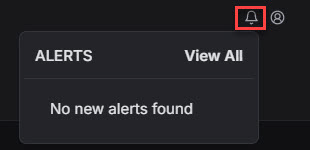
Alerts
This icon allows you to view alerts.
Settings
Settings (top right of each window) allow you to perform several actions such as managing preferences, accessing support, and exiting Synadia Cloud.
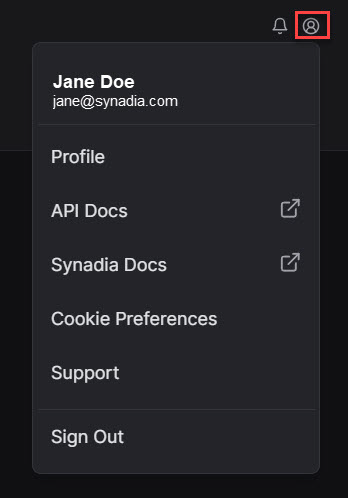
Settings include:
- Profile
- General – Allows you to view and update your Name and Email. You can also delete your account, which removes personal data and Personal Teams you have created.
- Access Tokens – Allows you to create and manage tokens for API access.
- API Docs
- Presents REST API calls, available for use if you have access/tokens.
- Synadia Docs
- Provides documentation specific to Synadia Cloud and Synadia Platform.
- Cookie Preferences
- Describes website cookie use, giving you the option to Accept All Cookies, Only Necessary Cookies, or Manage Cookie Preferences.
- Support
- Provides collaboration insight along with contact information for technical assistance.
- Sign Out
- Allows you to exit Synadia Cloud.